
Last updated on October 22nd, 2025
Valentine’s Day cookies don’t have to stick to just pink hearts and red roses. Here are decorating ideas for your Valentine’s day cookies, ranging from classic (there’s a reason why they’re tried and true, after all) to creative, all achievable in your home kitchen.

Classic Ideas – with a Twist
Conversation Heart Cookies
Instead of traditional sayings, personalize them with inside jokes, pet names, or quotes from your favorite shows. Use royal icing in pastel colors and practice your text piping on parchment paper first.
What You’ll Need
- Food coloring gels in pastel shades
- Small round piping tip (#2 or #3)
- Royal icing in flooding consistency
- Food-safe markers (for fine text details)
- Heart-shaped cookie cutter
Flood cookies with pastel base, let dry completely (6-8 hours), then pipe messages with slightly thicker icing or food markers

Love Letter Cookies
Rectangle cookies decorated to look like sealed envelopes, complete with a tiny royal icing wax seal. Add postage stamp details and address them to your valentine using edible markers.
What You’ll Need
- Rectangle cookie cutter
- White and red royal icing
- Small round piping tips (#1 and #2)
- Gold or silver luster dust
- Small clean paint brush
Flood in white, create “seal” effect using red royal icing mixed with luster dust, add details once base is dry

Time for Modern Takes!
Galaxy Love
Heart-shaped cookies with a dark blue, purple, and black marbled royal icing base, splattered with white icing for stars. Add edible silver or gold dust for extra sparkle. This technique is surprisingly forgiving since imperfections add to the cosmic effect.
What You’ll Need
- Navy, purple, and black gel food coloring
- White royal icing for stars
- Super fine paintbrush
- Vodka or clear extract for painting
- Gold or silver luster dust
Create marbled effect while icing is wet by dropping colors and swirling with a toothpick. Splatter white icing using a clean paintbrush for stars.

Geometric Hearts
What You’ll Need
Instead of solid colors, divide heart cookies into geometric sections using straight lines. Fill each section with a different shade of pink, red, or white, creating a stained-glass effect. The key is letting each section dry before adding adjacent colors.
- Various pink and red gel food colors
- Fine piping tip (#1)
- Ruler for marking guidelines
- Scribe tool or toothpick
- Heart cookie cutter
Plan design on paper first, pipe outline, let dry, then flood sections one at a time allowing each to dry before adding adjacent colors.
(Bonus tip: You can also use heart-shaped waffles and fill each indent with royal icing. You must use a waffle cookie recipe, otherwise regular waffles will be soggy.)

Add Whimsy to Your Cookies
Love Bugs
Heart-shaped cookies decorated as cute beetles or other insects in Valentine’s colors. This design works great with simple flood icing and doesn’t require intricate piping skills.
What You’ll Need
- Heart cookie cutter
- Black royal icing for details
- Pink/red flooding icing
- Round tips (#2 and #3)
Flood base colors first, add details once dry. You can also add jam filling in between two base cookies for an extra fruity touch (strawberry works well in my opinion!)

Garden Pressed Cookies
This design works best if you want a natural look for Valentine’s Day that steps away from traditional reds and pinks. The cookies can be round, heart-shaped, or even flower-shaped themselves if you prefer.
What You’ll Need
- White or very pale pink flooding consistency royal icing
- Edible flowers (such as pansies, violets, chamomile, lavender buds, rose petals)
- Small tweezers for flower placement
- Paper towels to press flowers flat
- Small paint brush for applying flowers
- Clear piping gel or light corn syrup (to help flowers stick)
- Optional: edible gold leaf for accents
Flood cookies with white or pale pink base. While icing is still wet (about 15 minutes after flooding), gently place pressed edible flowers. Use tweezers for precise placement. Very lightly press flowers into the still-soft icing. For best results, press flowers between paper towels 24 hours before using. Add tiny dots of gold leaf once dry for extra elegance
Safety Note: Only use flowers that are specifically grown for culinary use. Never use flowers from florists or garden centers as they may have been treated with chemicals not safe for consumption.
- Ensure flowers are specifically labeled as edible and pesticide-free
- Common edible options include:
- Violets (purple or white)
- Micro pansies
- Chamomile flowers
- Bachelor’s button petals
- Dried lavender buds
- Small rose petals
- Cornflowers
- Press flowers at least 24 hours ahead by laying them between paper towels and placing under heavy books
- Keep flowers in fridge until ready to use
- If using fresh (not pressed) flowers, add them just before serving as they may wilt

Time for Interactive Cookies
Cookie Puzzles
Make large heart cookies that break into 2-3 interlocking pieces. Decorate each piece so they form a complete design when assembled. Perfect for giving to children or playful partners.
What You’ll Need
- Large heart cutter
- Sharp knife for cutting shapes while dough is cold
- Coordinating colors of royal icing
- Small round tips (#1, #2)
- Paper templates for puzzle pieces
Cut dough when chilled, bake pieces slightly apart, decorate to align when assembled

Build-Your-Own Valentine
Create sets of small cookies in various shapes (simple ones like squares and rectangles, or more themed hearts, arrows, flowers) with different designs that recipients can arrange into their own valentine messages on a plate.
What You’ll Need
- Various small cutters (hearts, arrows, circles)
- Flooding and piping consistency icing
- Storage container with dividers
- Coordinating food colors
- Small round tips (#1, #2, #3)
Create consistent color palette across pieces, vary patterns but keep theme cohesive

A Touch of Sophistication
Lace-Effect Cookies
Use white royal icing to pipe delicate lace patterns over blush pink flood icing. Start with simple patterns like dots and swirls before attempting more complex designs. Try different colors that aren’t just Valentine-themed because why not!
What You’ll Need
- Very fine piping tip (#0 or #1)
- White royal icing (stiff consistency)
- Light pink flooding icing
- Practice parchment sheets
- Scribe tool for fixing mistakes
Flood base in light pink, let dry completely (8+ hours), pipe lace pattern with white icing starting from center

Watercolor Hearts
Similar to the galaxy cookies from earlier.
Float food coloring in clear alcohol (like vodka) to create watercolor effects on white flood icing. The technique is simple but looks impressively artistic.
What You’ll Need
- White flooding icing
- Gel food colors
- Clear alcohol (vodka) or extract
- Fine paint brushes
- Small containers for colors
- Paper towels for blotting
Flood cookies white, let dry completely. Mix tiny amounts of gel color with clear alcohol, paint on surface using light strokes

Tools You Might Need for All Designs
Some of these you might already have in your kitchen, so don’t forget to check before purchasing:
- Quality gel food colors (better than liquid)
- Multiple piping bags
- Coupling sets for different tips
- Squeeze bottles for flooding
- Good quality parchment paper
- Cookie spatula for transfer
- Cooling racks
- Container for keeping royal icing
- Toothpicks or scribe tool
- Damp cloth for tip cleaning
| Image | Title | Price | Prime | Buy |
|---|---|---|---|---|
 | Ann Clark Professional-Grade Gel Food Coloring, 12 Colors | PrimeEligible | Buy Now | |
 | Riccle Disposable Piping Bags 12 Inch - 100 Anti Burst Pastry Bags - Icing Piping Bags for Frosting - Ideal for Cakes and Cookies Decoration | PrimeEligible | Buy Now | |
 | Squeeze Writer Bottles 30ml/60ml Plastic Icing Bottles Small Easy Squeeze Bottles For Cakes Cookie Decoration | PrimeEligible | Buy Now | |
 | Wilton Piping Tip Set for Cake & Cupcake Decorating, 55-Piece with Carrying Case | PrimeEligible | Buy Now | |
 | 200 Pcs Unbleached Parchment Paper Baking Precut Non-Stick | PrimeEligible | Buy Now | |
 | OXO Good Grips Silicone Cookie Spatula | PrimeEligible | Buy Now | |
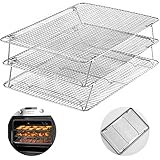 | HIWARE Stainless Steel Stackable Cooling Rack for Baking, Oven & Dishwasher Safe | PrimeEligible | Buy Now |
Ingredients Beyond Basic Cookie Recipe
- Meringue powder for royal icing
- Powdered sugar (sifted)
- Clear vanilla extract (to maintain white color)
- Corn syrup (small amount for shine)
- White gel food coloring (brightens colors)
| Image | Title | Price | Prime | Buy |
|---|---|---|---|---|
 | Meringue Powder (14oz) For Royal Icing, Premium Quality | PrimeEligible | Buy Now | |
 | Roots Circle Confectioners Sugar | Non GMO & Gluten-Free Powdered Sugar | PrimeEligible | Buy Now | |
 | Watkins Clear Vanilla Flavor, 11 fl. oz. Bottle | PrimeEligible | Buy Now | |
 | Karo Light Corn Syrup, 16 Fl Oz | Prime | Buy Now | |
 | Ann Clark Bright White Food Coloring Gel Large 4.5 oz Professional Grade | PrimeEligible | Buy Now |
Basic Valentine’s Cookie Recipes
You didn’t think I’d leave you wondering how to make the cookie base, did you? Here are a couple of favorites that I make because they’re easy and liked by pretty much everyone.
Classic Sugar Cookies for Decorating
- 3 cups all-purpose flour
- 1 teaspoon baking powder
- 1/2 teaspoon salt
- 1 cup (2 sticks) unsalted butter, softened
- 1 1/2 cups granulated sugar
- 2 large eggs
- 2 teaspoons vanilla extract
Mix dry ingredients. Cream butter and sugar until fluffy. Beat in eggs and vanilla. Gradually add dry ingredients. Chill 2 hours. Roll, cut, and bake at 350°F for 8-10 minutes until edges are just starting to turn golden.

Chocolate Roll-Out Cookies
- 2 1/2 cups all-purpose flour
- 1/2 cup cocoa powder
- 1 cup (2 sticks) unsalted butter, softened
- 1 1/2 cups granulated sugar
- 2 large eggs
- 2 teaspoons vanilla extract
- 1/4 teaspoon salt
Sift flour and cocoa. Cream butter and sugar. Add eggs and vanilla. Mix in dry ingredients. Chill 1 hour. Roll, cut, and bake at 350°F for 8-10 minutes. Let cool completely before decorating.

Kitchen Wisdom – Tips for Delicious Cookies
Tools
- All tools must be completely grease-free before starting, as any fat will break down royal icing.
- Clean tools between colors, and always have extra parchment paper and piping bags on hand.
Dough Handling
- Roll dough between two sheets of parchment paper to prevent sticking without adding excess flour
- Chill cut shapes for 10-15 minutes before baking to help maintain crisp edges
- For even baking, aim for consistent thickness (1/4 inch works well) and similar-sized cookies on each baking sheet
- Let your butter and eggs come to room temperature naturally for better dough consistency
Decorating Wisdom
- Always let cookies cool completely on a wire rack before decorating
- Make royal icing slightly thicker for outlining and thinner for flooding (aim for “10-second icing” – a line drawn through should disappear in 10 seconds)
- Work in small batches of royal icing, keeping the rest covered with damp cloth to prevent crusting
- Add a tiny bit of corn syrup to royal icing for subtle sheen
- For marbled effects, add dots of different colored icing and swirl gently with a toothpick before it sets
- Keep a damp paper towel nearby to clean piping tips between colors
Storage and Timing
- Plan ahead: undecorated cookies can be made 2-3 days in advance and stored in an airtight container
- Allow 6-8 hours for decorated cookies to dry completely before packaging
- Work in stages – bake one day, decorate the next for less stress
- Royal icing can be made ahead and stored in airtight containers in the fridge for up to 2 weeks
Additional Practical Tips
- Keep some undecorated cookies for children or those who prefer less sweet treats
- Have small treat bags available if guests want to take cookies home
- Display ingredients list for those with dietary concerns
- Keep cookies at room temperature for best taste and texture
- Have some gluten-free options if needed
Gifting Ideas
Packaging Suggestions
- Layer cookies with parchment or wax paper to protect decorations
- For stacked cookies, place similar shapes together to prevent breakage
- Small bakery boxes with clear windows showcase your work beautifully
- Mason jars work well for smaller cookies and add rustic charm
- Weather should affect when you choose packaging – humidity can affect icing after all
Creative Presentation
- Create cookie bouquets using food-safe sticks and decorative containers
- Arrange cookies on a heart-shaped board for a memorable party platter
- Include a mix of sizes and designs for visual interest
- Pair with homemade hot chocolate mix or coffee beans for a complete gift
- Add personalized gift tags with ingredients list and “best by” date

Serving Suggestions
Display Ideas
- Create a cookie grazing board with different shapes and colors grouped together
- Use tiered stands to add height and drama to your display
- Place individual cookies on vintage teacups or small plates for intimate gatherings
- Set up a “cookie bar” where guests can choose their favorites
- You can add fresh berries or chocolate-dipped strawberries as accompaniments
Pairings
- Offer both coffee and tea options
- Have milk alternatives available (oat milk pairs particularly well with cookies)
- Serve rosé champagne for adult gatherings
- Include hot chocolate options
- Consider offering small cups of dessert wine

Have a Sweet and Thoughtful Valentine’s
All these designs can be achieved with basic tools: piping bags, various tips, food coloring, and royal icing. Practice your techniques on parchment paper before working on the actual cookies. But remember that even imperfect cookies are delicious!
Presentation matters but don’t stress about perfection – homemade cookies carry their own charm, and the effort you put into making them is part of what makes them special.


