
Last updated on September 26th, 2025
Making pie crust with olive oil might sound unusual if you’ve grown up with traditional butter-based pastry. But this Mediterranean-inspired technique produces a wonderfully tender, flaky crust that’s not only delicious but also naturally vegan. Let’s learn this unique pastry technique!

Why Choose Olive Oil for Pie Crust?
Unlike butter-based crusts that require careful temperature control and resting periods, olive oil crusts come together quickly and don’t need chilling. The oil creates thin layers between the flour particles, resulting in a delicate, crisp texture that’s perfect for both sweet and savory pies.
Beyond convenience, olive oil adds its own subtle flavor notes that can enhance your pie filling. It’s heart-healthy, rich in antioxidants, and creates a crust that stays tender even after refrigeration – something traditional butter crusts sometimes struggle with.
Let’s Get to Know the Ingredients
The success of your pie crust depends largely on two factors: the quality of your olive oil and your flour choice.
Choosing Your Olive Oil
Reach for extra virgin olive oil with a mild to medium flavor profile.
You might love that peppery finish in your salad dressing, but an intensely flavored oil can overwhelm delicate pie fillings.
Sample your olive oil before using it – if it tastes fresh and pleasant, it’ll work beautifully in your crust.

- 【 The Highest Quality Cold-Pressed Moroccan Olive Oil】 The Atlas Mountains of Morocco help grow the most perfect olives in the world, thanks to the rare climate and the geographical advantage of the high-reaching area. We, at Atlas Olive Oils, pride ourselves on producing the highest quality cold-pressed Moroccan olive oil, which is sustainably sourced and ethically produced.
Prices pulled from the Amazon Product Advertising API on:
Product prices and availability are accurate as of the date/time indicated and are subject to change. Any price and availability information displayed on [relevant Amazon Site(s), as applicable] at the time of purchase will apply to the purchase of this product.
Flour – It Matters
All-purpose flour is your best friend here. Its moderate protein content creates just enough structure without becoming tough.
Whole wheat flour can be used, but I think it’s best to start with all-purpose until you’ve mastered the technique.
The proteins in whole wheat flour behave differently and can make your first attempts more challenging.

- ORIGINAL AND PURE - Einkorn is the original wheat and is better tolerated by people sensitive to modern wheat. Its gluten is weaker & therefore easier to digest; it should not be consumed by celiacs
Prices pulled from the Amazon Product Advertising API on:
Product prices and availability are accurate as of the date/time indicated and are subject to change. Any price and availability information displayed on [relevant Amazon Site(s), as applicable] at the time of purchase will apply to the purchase of this product.
Let’s Tackle Possible Problems
“Why did my crust crack when I rolled it out?”
This usually happens when the dough is too dry. Unlike butter-based crusts, olive oil pastry needs slightly more liquid to stay pliable. The dough should feel like soft play dough – if it’s crumbly, add water a teaspoon at a time until it comes together.
“My crust shrank in the oven!”
Shrinkage happens when the gluten in the flour gets overworked. Handle your dough gently and avoid stretching it when fitting it into the pie pan. Instead of pulling the dough, lift and ease it into place.
“The bottom is soggy!”
Par-baking is your secret weapon here.
Olive oil crusts benefit greatly from a 10-minute pre-bake at 375°F before adding wet fillings. Just remember to prick the bottom with a fork and use pie weights.
“Can I make the dough ahead?”
Absolutely!
Unlike butter-based doughs that need to stay cold, olive oil crust can be made ahead and stored at room temperature for a few hours or refrigerated for up to three days. If chilled, let it warm up slightly before rolling.

Important Techniques We’re Using
Rolling Out Your Crust
Here’s where olive oil crust differs significantly from traditional pastry.
While it can be rolled between sheets of parchment paper, many bakers prefer the press-in method. You can literally press the dough into your pie plate with your fingers, ensuring even coverage and eliminating the anxiety of transferring a rolled crust.
If you do roll it out, use gentle pressure and keep rotating the dough a quarter turn between rolls. This prevents sticking and helps maintain an even thickness. Don’t worry if you need to patch tears – olive oil dough is very forgiving and patches seamlessly.
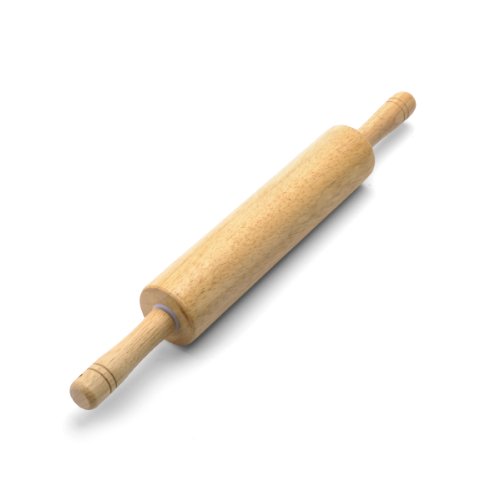
- DURABLE: made from moisture-resistant hardwood
Prices pulled from the Amazon Product Advertising API on:
Product prices and availability are accurate as of the date/time indicated and are subject to change. Any price and availability information displayed on [relevant Amazon Site(s), as applicable] at the time of purchase will apply to the purchase of this product.
Creating a Flaky Texture
The key to flakiness in an olive oil crust is minimal handling.
Mix just until the dough comes together, then stop. You’re not looking for the pea-sized butter pieces that traditional recipes mention – instead, you want a uniform, soft dough that holds together when pressed.
Decorative Edges
While olive oil crusts might not hold ultra-sharp decorative details like butter crusts, you can still create beautiful edges. A simple fork crimp works wonderfully, or try a classic finger-pinch crimp.
The dough’s pliability makes it perfect for braided edges too – just roll small portions into ropes and braid them before pressing onto the rim.
Working With Tricky Fillings
Wet Fillings
For juicy fruit pies or custards, brush the inside of your par-baked crust with egg white or melted chocolate. This creates a barrier that keeps the crust crisp.
You can also sprinkle a tablespoon of ground nuts or cookie crumbs on the bottom before adding wet fillings.
Hot Fillings
Unlike butter crusts that can melt and slump, olive oil crusts maintain their shape even with hot fillings.
However, always let your crust cool completely after par-baking before adding hot fillings to prevent sogginess.

My Tips!
- Keep your water ice cold – it helps prevent the development of too much gluten.
- Let the dough rest for 10 minutes after mixing if it feels tight or springs back when rolled.
- Don’t skip the salt in your recipe – it enhances flavor and helps control gluten development.
- If your crust browns too quickly, shield the edges with foil or a pie shield.
- Trust your instincts – the dough should feel pleasant to work with, not frustrating.
Adapting for Different Diets
The natural vegan-friendly nature of olive oil crust makes it perfect for vegans.
For gluten-free versions, replace the all-purpose flour with a cup-for-cup gluten-free blend and add 1/4 teaspoon xanthan gum if your blend doesn’t include it.

- Its Just - Xanthan Gum, 8oz, Batch Tested Gluten Free, Keto Baking, Non-GMO, Thickener for Sauces, Soups, Dressings, Packaged in USA
Prices pulled from the Amazon Product Advertising API on:
Product prices and availability are accurate as of the date/time indicated and are subject to change. Any price and availability information displayed on [relevant Amazon Site(s), as applicable] at the time of purchase will apply to the purchase of this product.
Recipe: Olive Oil Pie Crust
- Prep Time: 15 minutes
- Total Time: 25 minutes
- Yields: One 9-inch pie crust
Ingredients
- 2 cups all-purpose flour
- 1 teaspoon salt
- 1/2 cup mild extra virgin olive oil
- 4-5 tablespoons ice-cold water
- 1/2 teaspoon apple cider vinegar (optional, helps with tenderness)
How to Make
- In a large bowl, whisk together flour and salt until well combined.
- In a separate bowl, whisk together olive oil and 4 tablespoons of ice water until the mixture becomes slightly cloudy and emulsified.
- Pour the wet ingredients into the flour mixture. Using a fork, stir until the dough starts to come together. It should hold together when pressed but not be sticky. Add the remaining tablespoon of water if needed.
- Gather the dough into a ball with your hands. Don’t knead – just press it together gently.
- For a rolled crust: Place the dough between two sheets of parchment paper and roll to about 1/8 inch thickness. Peel off the top paper, invert over your pie plate, and peel off the second sheet.
- For a press-in crust: Place the dough ball directly in your pie plate and use your fingers to press it evenly across the bottom and up the sides.
- Trim the edges leaving a 1/2-inch overhang, then fold under and crimp as desired.
- For a par-baked crust: Prick the bottom all over with a fork, line with parchment and pie weights, and bake at 375°F for 10-12 minutes.

Notes
- The dough can be made ahead and stored in the refrigerator for up to 3 days.
- For a golden finish, brush the edge with plant-based milk before baking.
- This recipe doubles easily for double-crust pies.
- Works beautifully for both sweet and savory applications.
Storage
- Keep the baked crust covered at room temperature for up to 2 days, or freeze for up to 3 months.
Your Next Pie Crust Should Be Made with Olive Oil
Making pie crust this way opens up a world of possibilities for both traditional and modern pies.
Experiment with different olive oils and filling combinations. The more you work with this dough, the more you’ll appreciate its versatility and forgiving nature.
PrintOlive Oil Pie Crust

- Prep Time: 15 mins
- Total Time: 25 mins
- Yield: 1 crust (9 in) 1x
- Cuisine: Mediterranean
Ingredients
- 2 cups all-purpose flour
- 1 teaspoon salt
- 1/2 cup mild extra virgin olive oil
- 4–5 tablespoons ice-cold water
- 1/2 teaspoon apple cider vinegar (optional, helps with tenderness)
Instructions
- Whisk together flour and salt in a large bowl.
- In a separate bowl, whisk olive oil and 4 tablespoons of ice water until emulsified.
- Pour the wet mixture into the flour mixture and stir with a fork until the dough holds together but isn’t sticky, adding more water if needed.
- Gather the dough into a ball with your hands, pressing gently without kneading.
- For a rolled crust:
- Roll the dough between two sheets of parchment paper to 1/8 inch thickness.
- Peel off the top paper, invert over the pie plate, and remove the second sheet.
- For a press-in crust:
- Press the dough directly into the pie plate, covering the bottom and sides evenly.
- Trim edges, leaving a 1/2-inch overhang, then fold under and crimp as desired.
- For a par-baked crust:
- Prick the bottom with a fork, line with parchment and pie weights, and bake at 375°F for 10-12 minutes.
Notes
- The dough can be made ahead and stored in the refrigerator for up to 3 days.
- For a golden finish, brush the edge with plant-based milk before baking.
- This recipe doubles easily for double-crust pies.
- Works beautifully for both sweet and savory applications.
Storage
- Keep the baked crust covered at room temperature for up to 2 days.
- Freeze the baked crust for up to 3 months.


