
Confession time: Last week, I ate microwaved ramen for dinner three nights in a row. Why? Because after a 12-hour workday, the thought of cooking felt as appealing as a root canal. Fellow time-strapped food lovers, grab your microwave-safe containers. We’re about to turn that humming box in your kitchen into your secret weapon.

Sausage
- If sausages are linked, cut them apart.
- Prick small holes on the outside of each sausage.
- Place sausages on a microwave-safe plate, keeping them separate.
- Cover with a microwave-safe lid or paper towels.
- Microwave on high for 2 minutes.
- Turn sausages over and microwave for another 2 minutes.
- Remove peeling skins before serving.
Tips
- Pierce the sausage casing to prevent explosions due to pressure build-up.
- Use a microwave-safe plate and cover to prevent splatters.
- For faster cooking, cut sausages into smaller pieces or halves.
- Add a splash of water (about a tablespoon) to the dish for even cooking and to prevent drying out.
- Arrange sausages in a single layer, spaced out for even cooking.
- For multiple sausages, place them in a circle around the edge of the plate.
- Let sausages rest for a minute or two after cooking to avoid burns.
- Use a meat thermometer to ensure sausages reach 165°F (74°C) internal temperature.
- Use tongs or a fork to handle hot sausages after cooking.
- Enhance flavor by adding seasonings or brushing with olive oil and spices before cooking.
- Pair with quick sides like microwaved potatoes or a salad.
- For precooked sausages, microwave for about 50 seconds on high heat.
Full blog: How To Cook Sausage In The Microwave
Ramen
I did mention having ramen so often last week – I figured why not share the recipe I’d been relying on?
- Place 2 cups of water in a microwave-safe bowl.
- Microwave the water on high for 2 minutes.
- Add the ramen noodles to the hot water.
- Microwave on high for 5 minutes total, stirring halfway through.
- Add the seasoning packet after cooking and stir well.
Optional
- Add frozen vegetables or an egg for extra nutrition and flavor.
- Experiment with additional seasonings like soy sauce, miso paste, or a pat of butter.
- Garnish with scallions or green onions for extra flavor.
- I love adding sesame oil or sesame seeds to my broth as well.
Tips
- Use slightly less water than recommended for better control over noodle consistency.
- Consider breaking the noodle block in half for faster cooking.
- Add seasoning after cooking for better flavor distribution.
- Cook for 30 seconds less than package instructions, then check and adjust in 15-second intervals.
- Leave space at the top of the bowl to prevent overflow.
- Cover the bowl with a paper towel to contain splatters.
- Drain excess water to prevent soggy noodles.
- Use oven gloves when handling the hot bowl.
- Let the ramen cool slightly before eating.
- For best results, use half the amount of water to noodles ratio.
- Always use a microwave-safe bowl to avoid leaching toxins from plastic.
Full blog: How To Cook Ramen In The Microwave
Cup Noodles
- Open the Cup Noodles container
- Heat water in a microwave-safe cup for 1-2 minutes.
- Check water temperature (ideal is 195-212°F).
- Carefully pour hot water over the noodles in their original container.
- Cover the container and place something with weight on top to keep steam in.
- Wait for the time specified on the package for noodles to soften.
- Stir and enjoy.
Optional
- You can make Cup Noodles healthier by adding vegetables and protein.
- Egg and sesame oil are a good combo!
Tips
- Do not microwave Cup Noodles in their original styrofoam container. Styrofoam can release harmful chemicals like styrene and benzene when microwaved. These chemicals have been linked to various types of cancer in studies.
- Always use a microwave-safe container to heat water for Cup Noodles.
- Be careful when handling hot water to avoid burns.
- Consider using your own broth instead of the provided seasoning packet to reduce sodium.
- Store prepared noodles and broth separately in the refrigerator for 1-2 days maximum.
- For a different method, you can microwave the noodles in a microwave-safe bowl with water for 2-3 minutes.
- Consider preparing Cup Noodles on the stovetop if adding extra ingredients.
- Never microwave noodles without water as they may burn and create smoke.
Full blog: Can You Microwave Cup Noodles


Prices pulled from the Amazon Product Advertising API on:
Product prices and availability are accurate as of the date/time indicated and are subject to change. Any price and availability information displayed on [relevant Amazon Site(s), as applicable] at the time of purchase will apply to the purchase of this product.
Cookie Dough
Ingredients
- 2 tablespoons unsalted butter
- 1 tablespoon granulated white sugar
- 1 tablespoon brown sugar
- ⅛ teaspoon vanilla extract
- 5 tablespoons all-purpose flour
- ¼ teaspoon baking powder
- ⅛ teaspoon salt
- 3 tablespoons chocolate chips, divided
Instructions
- Melt butter in a microwave-safe mug for 20 seconds.
- Add sugars and vanilla extract to the melted butter.
- Mix in flour, baking powder, and salt.
- Stir in 2 tablespoons of chocolate chips.
- Flatten the dough in the mug.
- Top with remaining chocolate chips.
- Microwave for 1 minute.
- Allow to cool before eating.
Tips
- Microwave cookie dough for 30-45 seconds initially.
- Check and cook in 15-second intervals if needed.
- Use store-bought dough for best results when starting out.
- Be careful not to overcook, as it can lead to burning or drying out.
- Watch closely to avoid burning, especially after 30-45 seconds.
- Expect a different taste, texture, and appearance compared to oven-baked cookies.
- Use a microwave-safe plate or mug.
- Flatten the dough for more even cooking.
- Allow the cookie to cool before eating.
- Store microwaved cookies in the refrigerator for 1-2 weeks or freeze for up to 3 months.
- Check for doneness to ensure the cookie is cooked through.
- Be aware that homemade dough may become greasy when microwaved.
- Never eat raw or undercooked cookie dough due to health risks.
- Experiment with different recipes designed for microwave cooking.
- Adjust cooking time based on your microwave’s power and the size of the cookie.
Full blog: How Long to Microwave Cookie Dough
Toaster Strudel
- Place the frozen Toaster Strudel on a microwave-safe plate.
- Let it sit at room temperature for 5 minutes.
- Microwave for 30 seconds.
- Check if it’s cooked and crispy. If not, continue microwaving in 10-second intervals until done.
- Turn the Toaster Strudel over occasionally to ensure even cooking.
- Once cooked, spread the provided icing packet over the top.
Tips
- Use a microwave-safe plate.
- Allow the frozen Toaster Strudel to sit at room temperature for 5 minutes before microwaving.
- Start with 30 seconds of cooking time and adjust as needed.
- Check frequently and use 10-second intervals for additional cooking if necessary.
- Flip the Toaster Strudel during cooking for even heating.
- Be careful when eating, as the filling can be extremely hot.
- Apply the icing while the Toaster Strudel is still warm for better spreading.
- Microwaving is a quick alternative to using a toaster or toaster oven.
- Cooking time may vary depending on your microwave’s power.
- Remember that microwaving may not yield the same crispy texture as toasting.
- The microwave method is suitable when a toaster isn’t available.
Full blog: Toaster Strudel Microwave
Hot Pockets
- Remove Hot Pockets from their wrappers.
- Pierce the tops all over with a fork.
- Place both Hot Pockets on a microwave-safe plate (without the crisping sleeves).
- Microwave on high for about 3 minutes and 30 seconds (for an 1100-watt microwave).
- Check for even heating and adjust time if needed.
- Let cool briefly before eating, as the filling will be very hot.
Tips
- Cooking time varies based on microwave wattage: 3:30 for 1100W, 4:00 for 900W, 4:30 for 700W.
- Pierce the tops with a fork to allow steam to escape and prevent exploding.
- Skip the crisping sleeve for better heating.
- It’s best to cook Hot Pockets one at a time for more even heating.
- When cooking two, expect one to be hotter than the other.
- For a 700-watt microwave, cook two Hot Pockets for about 4 minutes and 30 seconds.
- Breakfast Hot Pockets may need 3:30 to 3:45 to cook.
- Ham and cheese Hot Pockets typically take about 3:30 for two.
- Use a microwave-safe crisping plate for a crispier crust.
- Consider defrosting before cooking for a crispier result.
- Add 30 seconds to normal cooking time for a crispier crust.
- Adjust cooking time based on your specific microwave’s performance.
- For better results, consider heating Hot Pockets one at a time.
Full blog: How Long to Microwave 2 Hot Pockets
Milk
- Choose a microwave-safe cup or bowl.
- Pour the desired amount of milk into the container.
- Cover the container with a single paper towel (lay it flat).
- Microwave for 10 seconds.
- Remove and stir the milk.
- Return to the microwave for another 10 seconds.
- Remove, stir, and check the temperature.
- Repeat 10-second intervals until the milk reaches desired warmth.
Tips
- It is safe to heat milk in the microwave, except for breast milk or baby formula.
- Use only microwave-safe containers to avoid chemical leaching or fire hazards.
- Heat milk in short intervals to prevent scorching, explosions, or film formation.
- Stir between heating intervals for even warming and to prevent curdling.
- Look for steam as an indicator that the milk is sufficiently heated.
- Be cautious when removing the milk as it may be very hot.
- Taste differences between microwave and stove-heated milk are subjective. Heating on the stove may take longer but some prefer the taste.
- If the milk curdles or develops a film, it’s best to start over with fresh milk.
Full blog: How to Heat Milk in the Microwave
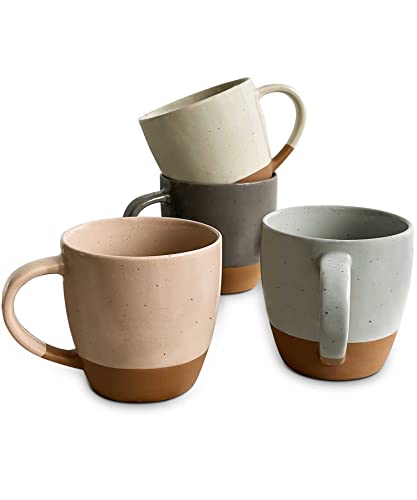





Prices pulled from the Amazon Product Advertising API on:
Product prices and availability are accurate as of the date/time indicated and are subject to change. Any price and availability information displayed on [relevant Amazon Site(s), as applicable] at the time of purchase will apply to the purchase of this product.
Hot Chocolate
Ingredients
- 2 tbsp unsweetened dark cocoa powder
- 2 tbsp maple syrup
- 1 dash salt
- 1 dash cinnamon (optional)
- 1 cup milk (dairy or plant-based)
- ½ tsp vanilla extract
- ⅓ cup marshmallows (optional)
Instructions
- In a microwave-safe mug, combine cocoa powder and maple syrup. Stir until fully incorporated.
- Add salt, cinnamon (if using), and vanilla extract to the mug. Stir briefly.
- In a separate microwave-safe container, pour the cold milk.
- Microwave the milk on medium-high power in 15-second intervals, stirring between each interval. This typically takes about 60-90 seconds total.
- Use a food thermometer to check the milk temperature. Aim for 130-160°F (54-71°C) for optimal drinking temperature.
- Carefully pour the hot milk into the mug with the chocolate mixture.
- Gently stir until all ingredients are combined.
- Top with marshmallows if desired.
- Let cool slightly before enjoying.
Tips
- For plant-based milks, consider lowering microwave power to medium to prevent thickening.
- Coconut milk can add a delicious flavor twist to your hot chocolate.
- Be careful not to overheat the milk to prevent scorching or film formation.
- Always use microwave-safe containers to avoid potential fire hazards.
- Stir the milk between intervals to ensure even heating and prevent hot spots.
- If using room temperature milk, reduce the heating time, but ensure it hasn’t been out for more than two hours.
Full blog: How Long to Microwave Milk For Hot Chocolate
BONUS – Boiled Water in the Microwave
I’m including this here in case you just don’t have time for boiling a kettle. Use the microwave for boiling water!
- Choose a microwave-safe container, preferably glass or ceramic.
- Fill the container about 3/4 full with water to prevent spillage.
- Place a microwave-safe item (like a wooden spoon) in the water to prevent superheating.
- Put the container in the microwave uncovered.
- Microwave on high power for the following times based on your microwave wattage:
- 600W: 4 minutes
- 700W: 3 minutes
- 800W: 2.5 minutes
- 1,000W: 2 minutes
- 1,200W: 1.5 minutes
- After the time is up, carefully open the microwave door to allow steam to escape.
- Use an oven mitt or cloth towel to remove the container, keeping it away from your face and body.
- If desired, tap the container with a long spoon to trigger any water movement and prevent superheating.
- Let the water stand for a moment to ensure it’s fully boiled and any superheating has dissipated.
Tips
- Never use metal containers or containers with metallic paint.
- Avoid using plastic containers, as they may melt or leach chemicals.
- Don’t seal the container, as pressure buildup can cause explosions.
- Be cautious of steam when opening the microwave.
- If sterilizing water, boil for at least 1 minute after reaching boiling point.
Full blog: How Long to Boil Water in Microwave
Under 90 Seconds!
So there you have it – your ticket to quick meals and drinks. Next time you’re bleary-eyed at 3 AM, desperately seeking sustenance, remember: your microwave is there for easy meals, desserts, and drinks.
Just don’t forget the golden rule of microwave mastery: what goes in hot, comes out thermonuclear.


