
Last updated on February 17th, 2026
You may think that you can’t make breadcrumbs sans a food processor. After all, realistically, what else can get bread to become as fine and evenly sized? Well, lemme tell you, it IS possible to make breadcrumbs without using a food processor! Here are three different methods that’ll show you how to make breadcrumbs if you don’t have a food processor at home.

How Do You Make Breadcrumbs Without A Food Processor?
Do you need a food processor to make breadcrumbs? Absolutely not! There are plenty of ways to make breadcrumbs either by hand or find appliances to replace a food processor.
The three best methods for making breadcrumbs without a food processor:
- Blender – Fast and efficient
- Hand grater – Creates uniform texture
- Rolling pin – Perfect for small batches
Food Processor vs Manual Breadcrumbs
| Advantages | Challenges |
|---|---|
| Choose the type of bread you want to use | Making sure the size is even |
| Made from 100% breadcrumbs with no filler ingredients | Making breadcrumbs look consistent |
| Free of preservatives | |
| Can use any type of breading | |
| Full control over what breadcrumbs are made from |
How To Make Breadcrumbs With A Blender
The blender method is the closest alternative to a food processor and produces excellent results with minimal effort.
Here are instructions to make breadcrumbs with a blender:
- Step 1: Tear up the fresh or toasted bread into small pieces.
- Step 2: Add a few pieces of bread to the blender to make the first batch.
- Step 3: Turn on blender for 30 seconds before checking how small the bread crumbs are.
- Step 4: Once you have blended to an even consistency, sift the bread crumbs and repeat the process.
Find a strong bender that will be able to cope when blending the breadcrumbs.
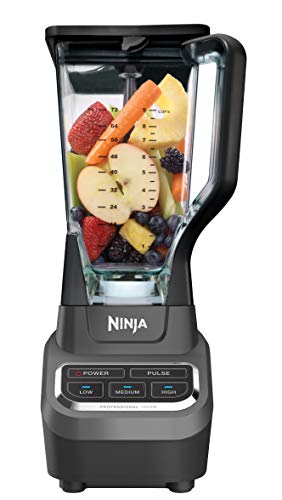
- PROFESSIONAL POWER: 1000 watts of professional power can crush ice and breakdown any tough ingredient.Power source : Corded Electric.Amperage : 12.5 amps
Prices pulled from the Amazon Product Advertising API on:
Product prices and availability are accurate as of the date/time indicated and are subject to change. Any price and availability information displayed on [relevant Amazon Site(s), as applicable] at the time of purchase will apply to the purchase of this product.
Can You Use a Hand Blender?
Yes! An immersion blender works wonderfully for breadcrumbs.
Place bread pieces in a deep bowl and blend in short bursts, moving the blender around to ensure even processing. You can always blend small batches of bread at a time to give the blender time to keep up.
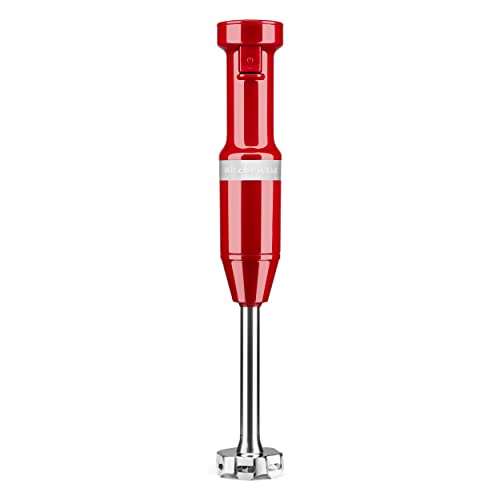
- Removable 8 Blending Arm, with 4-point stainless steel blade that quickly blends ingredients for smoothies, milk shakes, soups, hummus and more
Prices pulled from the Amazon Product Advertising API on:
Product prices and availability are accurate as of the date/time indicated and are subject to change. Any price and availability information displayed on [relevant Amazon Site(s), as applicable] at the time of purchase will apply to the purchase of this product.
Tips for Blender Method
- Use a high-powered blender (1000+ watts) for best results
- Work in small batches to prevent uneven grinding
- Let the blender rest between batches to prevent overheating
How To Make Breadcrumbs By Hand
Making breadcrumbs by hand? Yes, it is possible. But it may take you a long time.
We have two methods that can make breadcrumbs by hand for you to try out yourself.
Hand Grater
The first method uses a grater, which we are sure you’ll have hiding somewhere in your kitchen cupboard.
Here is how to make breadcrumbs by hand with a grater:
- Step 1: Toast a piece of bread using a toaster or keep your bread dry.
- Step 2: Start to grate your bread against a box-shaped larger grater.
- Step 3: Once you are near the end of grating the whole piece of bread, check the size of your breadcrumbs and remove any large breadcrumbs you don’t like.
- Step 4: Repeat this until you have the desired amount of breadcrumbs.
Even though a grater will be time consuming and difficult, it will create more even sized breadcrumbs.

- ZEST, SHRED, SLICE, GRATE: say goodbye to endless kitchen tools and hello to the 4 in 1 all purpose cheese grater; 4 sides allow you to grate, shred, zest and slice nearly any food with ease; use on vegetables, fruits, chocolate, bread, cheeses, and just about anything else to create delightful recipes
Prices pulled from the Amazon Product Advertising API on:
Product prices and availability are accurate as of the date/time indicated and are subject to change. Any price and availability information displayed on [relevant Amazon Site(s), as applicable] at the time of purchase will apply to the purchase of this product.
Rolling Pin
The second method involves toasting the bread and using a rolling pin.
Here is how to use a rolling pin to make breadcrumbs by hand:
- Step 1: Heat the oven to 350 degrees Fahrenheit. Slice the bread into halves and toast the bread for 15 minutes.
- Step 2: Once the bread is toasted, allow the bread to cool for 5 minutes and turn stiff and solid.
- Step 3: Place the bread into thick plastic see-through airtight cooking bags. Make sure to get tough bags or the bags may break while you’re hand-making the breadcrumbs.
- Step 4: Crush the bread in the bag with a rolling pin. Check the consistency and keep crushing until the breadcrumbs are a uniform size.
How To Make Breadcrumbs Without Bread
Yes, you can still make breadcrumbs even without bread. There are plenty of alternatives.
Crackers, pretzels, cornflakes and unsweetened cereals can all be used to replace breadcrumbs.
Best Bread Alternatives:
- Crackers – Saltines or Ritz work excellently
- Pretzels – Add a subtle salty flavor
- Cornflakes – Create a light, crispy coating
- Unsweetened cereals – Rice Krispies or similar
- Panko alternatives – Crushed tortilla chips
Processing Method:
Place your chosen substitute in a sturdy plastic bag and crush with a rolling pin or heavy pan until you reach desired consistency.

How To Make Breadcrumbs With A Toaster
This method is perfect for small batches and gives you excellent control over browning.
Here’s how to make breadcrumbs with a toaster:
- Step 1: Toast bread slices until very dry and golden-brown. The bread should be crisp throughout—not just on the surface.
- Step 2: Allow toast to cool completely (this prevents powdering).
- Step 3: Break into pieces and place in an airtight bag.
- Step 4: Crush gently with a rolling pin, checking frequently to avoid over-processing.
Warning: Well-toasted bread can quickly turn to powder, so crush carefully and check texture often.
Be careful when crushing toasted slices of bread to make breadcrumbs, as well-toasted bread can turn into a powder if it crumbles too much.
Therefore it’s better to hand make toasted breadcrumbs.
How Do You Make Breadcrumbs Without Panko
Panko is a Japanese style of breadcrumbs, which is often used as a coating for fried foods and meats. Panko is made by baking breadcrumbs to give them more crunch and color.
Just like bread, panko is easy to substitute.
Crushing cornflakes, cracker crumbs or tortilla chips can all be great substitutes for panko due to their crunchy texture. You can blend these ingredients either by hand or by using a blender.
Crackers and cornflakes will be easier to turn into consistent crumbs by hand than breadcrumbs are as they have more of a dense, breakable consistency.
Best Panko Substitutes:
- Crushed cornflakes – Light and crispy
- Cracker crumbs – Easy to control consistency
- Crushed tortilla chips – Adds flavor and crunch
- Crushed rice cakes – Ultra-light texture
Processing Tips:
These ingredients actually crush more easily and consistently than regular bread, making them ideal for hand-processing methods.

Storage and Shelf Life
How Long Do Homemade Breadcrumbs Last?
Room Temperature: Up to 2 weeks in an airtight container
Refrigerated: Up to 2 months in sealed container
Frozen: Up to 6 months in freezer-safe bags
Storage Tips
- Freeze in portion-sized bags for convenience
- Always ensure breadcrumbs are completely cool before storing
- Use airtight containers to prevent moisture absorption
- Label with date for easy tracking
Making Perfect Breadcrumbs is Possible Without Special Equipment!
You don’t need to rush to buy a food processor anytime soon. There are great ways to make breadcrumbs using blenders and your hand.
Making breadcrumbs at home can give you more control over what the of breadcrumbs you use and is well worth the effort.
FAQs
What Can You Use If You Don’t Have Breadcrumbs?
If you have an allergy to wheat and gluten or even an intolerance, you may want to replace breadcrumbs. There are so many other natural ingredients you can use to replace bread crumbs, which are all cost-effective and easily accessible.
Cornflakes, oats, pretzels, nuts and seeds of any kind, potato chips, crackers and shredded coconut can all be used as a replacement for breadcrumbs. All of these ingredients contain a slight crisp to them and can be blended to be as fine as bread crumbs can be.
How Long Do Homemade Breadcrumbs Last?
If you are storing your breadcrumbs at room temperature, they will last for a maximum of two weeks before you should discard them. If you store your breadcrumbs in the fridge, they can keep for two months before turning bad. If freezing your breadcrumbs, their expiry date extends to six months.
Can I Make Breadcrumbs from Stale Bread?
Absolutely! Stale bread actually works better than fresh bread because it’s already partially dried out. This saves you the toasting step and often produces more consistent results.
What’s the Best Bread Type for Homemade Breadcrumbs?
For neutral flavor: White sandwich bread or French bread For rich flavor: Sourdough or whole wheat For fine texture: Day-old sandwich bread For coarse texture: Artisan breads or rustic loaves


