
Cookie dough is often thought of as a delightful guilty pleasure, enjoyed straight from the mixing bowl while baking a batch of cookies. But what if I told you that this versatile treat can be transformed into a variety of mouth-watering desserts you never imagined possible? Explore with me 30 creative cookie dough desserts that will please your sweet tooth and inspire your inner baker. A fan of classic chocolate chip? Or maybe adventurous flavors? These recipes are sure to become your new favorites.
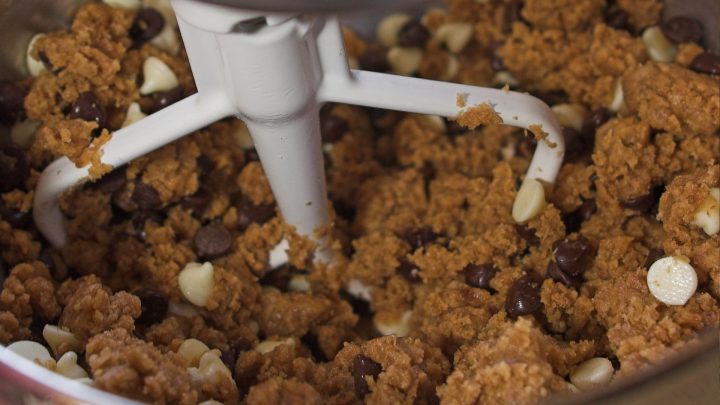
Low Calorie Cookie Dough
For this recipe, we’re aiming to replace high-calorie ingredients with lighter alternatives. This is ideal for those who love cookie dough but want to stick to a diet.
Ingredients
- ¼ cup salted butter (room temperature)
- ¼ cup sugar
- 1 teaspoon vanilla extract
- ½ cup flour (heat-treated)
- Colorful sprinkles
How to Make
- In a bowl, cream together the salted butter, sugar, and vanilla extract using a stand mixer or by hand until light and fluffy.
- Gradually add the heat-treated flour, mixing well after each addition until fully incorporated.
- Gently fold in the colorful sprinkles.
- Serve immediately or chill before enjoying.
Tips
- Focus on using ingredients that are low in calories and fats.
- Be careful with substitutions, as improper ratios can affect texture and taste.
Variations
- Banana Flavored Cookie Dough: Uses mashed bananas and cashew butter.
- Single Serving Options: Recipes designed for single servings to control portion sizes.
Full blog: Low Calorie Cookie Dough

Low Sugar Cookie Dough
Low sugar dough can be just as delicious and satisfying as traditional dough with the right ingredients.
Use alternative sweeteners like erythritol, stevia, or xylitol to reduce calories and impact on blood sugar levels. Over time, reducing sugar can enhance the appreciation of natural flavors like vanilla, cinnamon, and nutmeg.
Ingredients
- 1/4 cup butter, melted
- 1/4 cup maple syrup
- 1 tbsp vanilla extract
- 1/4 tsp salt
- 2 cups old-fashioned rolled oats
- 1/8 tsp cinnamon
- 1/2 cup semi-sweet chocolate chips (or white chocolate chips)
How to Make
- Melt the butter over the stove and allow it to cool for at least 5-6 minutes.
- Place old-fashioned rolled oats into a blender and blend until they resemble a fine powder.
- In a mixing bowl, combine the ground oats, cooled butter, vanilla extract, salt, and cinnamon. Stir until well combined.
- Gently fold in the chocolate chips.
- Enjoy at room temperature or refrigerate for at least 30 minutes before serving.
Tips
- Add sugar-free chocolate chips, nuts, spices, or peanut butter for added flavor.
- Store in the refrigerator for up to a week or freeze for longer preservation.
Full blog: Low Sugar Cookie Dough

Red Velvet Cookie Dough
This recipe is easy to make, featuring a rich and chocolatey flavor with a vibrant red color, perfect for special occasions like Valentine’s Day.
Ingredients
- 1¼ cups all-purpose flour
- ¾ cup butter, softened
- ¾ cup brown sugar, packed
- 3 tablespoons granulated sugar
- 1/16 teaspoon salt
- 1 teaspoon pure vanilla extract
- Red gel food coloring (use until desired color is reached)
- 2½ tablespoons cocoa powder
- 3 tablespoons milk (or dairy-free alternative)
- ½ cup chocolate chips (a mix of milk and dark chocolate works well)
How to Make
- Preheat the oven to 350°F (175°C).
- Spread the flour on a baking sheet lined with parchment paper.
- Bake for about 7 minutes, stirring halfway through to ensure even heat treatment.
- Let it cool completely.
- In a large bowl, combine brown sugar, granulated sugar, softened butter, and salt. Mix until creamy and lightened in color.
- Add vanilla extract and red gel food coloring. Mix well. Add more coloring if needed to achieve the desired hue.
- Sift together the heat-treated flour and cocoa powder, then gradually mix into the sugar-butter mixture.
- Add milk gradually until the dough reaches the desired consistency.
- Stir in chocolate chips until evenly distributed.
- Use a spoon or scooper to form bite-sized balls of dough.
- Place them on a baking sheet or plate and refrigerate for at least 30 minutes.
- Serve chilled or at room temperature.
Tips
- Substitute with 1:1 gluten-free flour or oat flour (no need to heat treat oat flour).
- Use vegan butter for a dairy-free version.
- Use sugar alternatives if needed.
- Opt for sugar-free or use a variety of chocolate types.
- Use any dairy-free milk, but be mindful of flavors (e.g., coconut milk).
- Always heat treat flour to kill bacteria and make it safe for consumption.
- Keep dough refrigerated to maintain freshness and safety.
Full blog: Red Velvet Cookie Dough

Peanut Butter Cookie Dough
With just four simple ingredients – peanut butter, almond flour, dates, and chia seeds – it comes together in minutes. This protein-packed, fiber-rich cookie dough makes the perfect healthy treat to grab for a snack or dessert.
Ingredients
- 1 cup natural peanut butter (smooth or crunchy, based on preference)
- 1 cup almond flour
- 1 cup dates, pitted (if they’re dry, soak them in warm water for 10–15 minutes, then drain)
- 2 tablespoons chia seeds
How to Make
- If your dates are not soft, start by soaking them in warm water for about 10–15 minutes to soften them up. After soaking, drain them well.
- In a food processor, blend the softened dates and chia seeds until you get a smooth paste. This will take a few minutes, and you might need to scrape down the sides of the bowl occasionally.
- To the date and chia mixture, add the peanut butter. Blend again until the mixture is well combined and smooth. You want a homogeneous mixture where all the ingredients are evenly distributed.
- Finally, add the almond flour to the mixture in the food processor. Pulse or blend until the mixture comes together to form a dough-like consistency. If the dough feels too sticky, you can add a bit more almond flour until you reach the desired texture.
- For easier handling, you might want to chill the dough in the refrigerator for about 30 minutes. This step is optional but can make the dough easier to work with, especially if you find it too sticky at room temperature.
- Once the dough is ready, use a spoon or your hands to form small balls or cookie shapes. You can press them down slightly on a baking sheet lined with parchment paper if you like them flatter, resembling traditional cookies.
- Since there are no raw ingredients that need cooking, you can enjoy these cookies raw. Alternatively, if you prefer them a bit firmer, you can freeze them for about an hour before serving.
Tips
- Dates: Ensure dates are soft and moist; soak if needed.
- Peanut Butter: Stir well if the oil has separated.
- Blending: Avoid over-blending almond flour to prevent separation.
- Chill: Chill dough if too sticky to handle.
- Fruit: Serve with apple, pear, or banana slices.
- Yogurt: Pair with plain Greek or vanilla yogurt.
- Granola: Top with crunchy granola or clusters.
- Berries: Add fresh raspberries, strawberries, or blueberries.
- Sweeteners: Drizzle with honey or maple syrup.
- Nuts: Top with chopped peanuts, cashews, or almonds.
- Chocolate Chips: Sprinkle with mini chocolate chips or cacao nibs.
- Peanut Butter Chips: Add mini peanut butter chips for extra flavor.
Recipe Variations
- Peanut Butter Substitutes: Almond butter, sunflower seed butter, or tahini.
- Almond Flour Substitutes: Cashew flour, sunflower seed flour, oat flour.
- Date Substitutes: Raisins, dried apricots, prunes, applesauce.
- Chia Seeds Substitutes: Ground flaxseed, hemp seeds, chopped nuts.
Full blog: Peanut Butter Cookie Dough

White Chocolate Chip Cookie Dough
With the addition of white chocolate chips and optional macadamia nuts, this dough is perfect for satisfying late-night cravings.
Ingredients
- 1 cup heat-treated all-purpose flour
- 1/2 cup salted butter, softened
- 6 tablespoons packed light brown sugar
- 5 tablespoons granulated sugar
- 1/8 teaspoon salt
- 1 1/2 tablespoons milk (more as needed)
- 1/2 teaspoon vanilla extract
- 1/2 cup white chocolate chips
- 1/2 cup macadamia nuts, optional
How to Make
- Preheat the oven to 350°F (175°C).
- Spread the flour evenly on a baking sheet.
- Bake for 5-10 minutes, making sure not to burn it.
- Let the flour cool completely before using.
- In a bowl, cream together the softened butter, brown sugar, and granulated sugar until light and fluffy.
- Add salt and vanilla extract to the mixture.
- Sift the heat-treated flour over the mixture and stir until just combined.
- Gradually add 1 1/2 tablespoons of milk, mixing to reach desired consistency.
- Fold in the white chocolate chips and macadamia nuts (if using) with a spatula.
- Portion the dough and roll into balls if desired.
- Place the dough in the refrigerator until firm.
- Enjoy immediately or continue to refrigerate for up to 5 days.
- Store in the freezer for up to 3 months for the best quality.
Tips
- Ensure flour is completely cool before adding to the dough to maintain texture.
- Adjust milk quantity to achieve the desired consistency.
- Chilling helps the dough firm up for better texture and flavor.
Variations
- Chocolate Chips: Substitute white chocolate chips with dark or milk chocolate chips if preferred.
- Nuts: Swap macadamia nuts with other nuts like almonds or pecans.
Full blog: White Chocolate Chip Cookie Dough
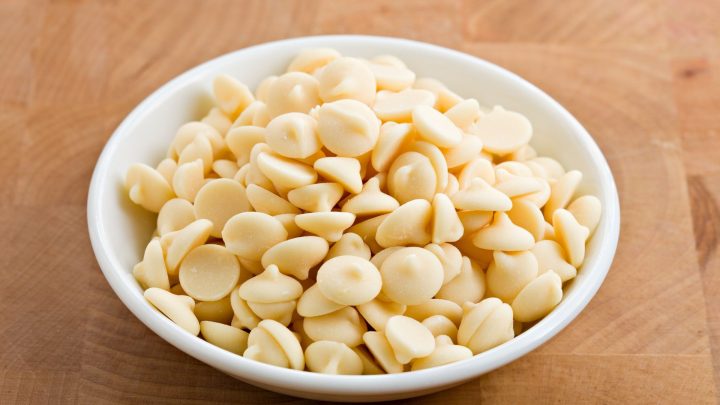
Oreo Cookie Dough
Combine the love of cookie dough and Oreos with this delicious, safe-to-eat edible Oreo cookie dough. This recipe requires no baking, so you can enjoy it straight from the bowl.
Filled with Oreo crumbs and chocolate chips, this cookie dough is a delightful treat for Oreo fans (like me!).
Ingredients
- 1 cup granulated sugar
- 1/2 cup unsalted butter, softened
- 1/4 cup milk
- 1 teaspoon vanilla extract
- 1/2 teaspoon kosher salt
- 1 1/2 cups all-purpose flour, heat-treated
- 1 cup Oreo cookies, roughly chopped (about 10 cookies)
- 1/2 cup chocolate chips (optional)
How to Make
- Preheat the oven to 350°F (175°C).
- Spread the flour on a parchment-lined baking sheet and bake for 10 minutes. Allow it to cool completely.
- In a large mixing bowl, combine softened butter and granulated sugar. Mix with a hand mixer until light and creamy.
- Add vanilla extract, kosher salt, and milk to the mixture. Continue mixing until smooth and consistent.
- Gradually add the cooled flour to the bowl, mixing well after each addition to ensure no clumps remain.
- Fold in the chopped Oreo cookies and chocolate chips using a silicone spatula to maintain the dough’s airy texture.
- Enjoy the cookie dough immediately or form it into balls for easy snacking.
- Store any leftovers in an airtight container in the refrigerator for up to 5 days or freeze for up to a month. Thaw in the fridge overnight before eating.
Tips
- Ensure flour is completely cool before adding to the dough for the best texture.
- Roughly chop the Oreos to add texture and flavor without making the dough too dry.
- Adjust the milk quantity to reach the desired consistency.
This edible Oreo cookie dough is the perfect treat for those who love the classic flavor of Oreos in a no-bake, safe-to-eat format. Enjoy it by itself, with ice cream, or as a topping for your favorite desserts!
Full blog: Oreo Cookie Dough





Prices pulled from the Amazon Product Advertising API on:
Product prices and availability are accurate as of the date/time indicated and are subject to change. Any price and availability information displayed on [relevant Amazon Site(s), as applicable] at the time of purchase will apply to the purchase of this product.
Godiva Cookie Dough
This homemade edible Godiva cookie dough is a decadent twist on traditional chocolate chip cookie dough, incorporating the rich flavors of Godiva chocolate. A luxurious treat for any chocolate or cookie dough lover.
Ingredients
- 7 ounces GODIVA Large 72% Dark Chocolate Bars
- 1 1/2 sticks butter, softened
- 1/2 cup + 4 tablespoons brown sugar
- 6 tablespoons granulated sugar
- 2 teaspoons vanilla extract
- 1/8 teaspoon cinnamon (optional)
- 1 1/2 cups heat-treated all-purpose flour
- 1/2 teaspoon salt
- 2 tablespoons milk
How to Make
- Heat-Treat the Flour
- Microwave Method: Place flour in a microwave-safe bowl and heat in 30-second intervals until the flour reaches 165°F. Allow to cool.
- Oven Method: Preheat oven to 350°F (175°C). Spread flour on a lined baking sheet and bake for 7-10 minutes. Cool completely.
- Assemble the Cookie Dough
- Chop the Godiva chocolate bar into small chunks and set aside.
- In a large mixing bowl, combine softened butter, brown sugar, and granulated sugar. Mix until creamy and smooth.
- Add vanilla extract and cinnamon (if using) to the mixture.
- Gradually incorporate the cooled flour and salt into the mixture, using a hand mixer if desired.
- Add milk gradually until the dough pulls together into a smooth consistency.
- Fold in the chopped Godiva chocolate chunks.
- Form and Chill
- Portion the dough into bite-sized balls and arrange them on a prepared baking sheet.
- Chill or freeze the dough balls for at least one hour before eating.
- Enjoy them at room temperature or directly from the refrigerator.
Tips
- Ensure flour is completely cool before adding to the dough to prevent clumping.
- Chilling the dough enhances the flavor and makes it easier to handle.
- Use high-quality Godiva chocolate for the best flavor.
Full blog: Godiva Cookie Dough


Prices pulled from the Amazon Product Advertising API on:
Product prices and availability are accurate as of the date/time indicated and are subject to change. Any price and availability information displayed on [relevant Amazon Site(s), as applicable] at the time of purchase will apply to the purchase of this product.
Air Fryer Cookie Dough
Enjoy delicious chocolate chip cookies baked in an air fryer for a quick and hassle-free treat. This method eliminates the need to preheat an oven, making it a convenient option for freshly baked cookies in minutes.
Ingredients
- 1 cup all-purpose flour
- 1/2 cup granulated sugar
- 2 teaspoons vanilla extract
- 1/2 teaspoon baking soda
- 1/4–1/2 cup chocolate chips (to taste)
- 1/4 teaspoon salt
- 1/4 cup butter, at room temperature
How to Make
- In a large mixing bowl, combine room-temperature butter and granulated sugar. Mix with a hand mixer or whisk until light and creamy.
- Add vanilla extract, baking soda, and salt to the mixture. Mix until well combined.
- Gradually add the flour, mixing continuously to avoid lumps.
- Gently fold in the chocolate chips with a silicone spatula to preserve the airy texture.
- Refrigerate the dough for 10-30 minutes to make it easier to handle.
- Line the air fryer basket with a silicone insert or parchment paper.
- Use a scoop to form cookie dough balls, spacing them about an inch apart in the basket.
- Set the air fryer to 350°F (175°C) and cook for 5-7 minutes until cookies are golden brown and slightly crispy, or adjust to your preference for chewiness.
- Let cookies cool for a couple of minutes before enjoying.
Tips
- Gradually add flour to prevent lumps and achieve the desired dough consistency.
- Line the basket with parchment paper or silicone liners to prevent sticking.
- Adjust cooking time for desired cookie texture (chewy or crispy).
Full blog: Cookie Dough Air Fryer


Prices pulled from the Amazon Product Advertising API on:
Product prices and availability are accurate as of the date/time indicated and are subject to change. Any price and availability information displayed on [relevant Amazon Site(s), as applicable] at the time of purchase will apply to the purchase of this product.
Protein Cookie Dough
This is a protein-packed cookie dough recipe, providing 20 grams of protein per serving. Perfect for those who want boost their protein intake. Quick and easy to make without baking!
Ingredients
- 1 cup protein powder (vanilla or your choice)
- 1 cup peanut butter (or any nut butter)
- 1/4 cup milk (use low-fat or fat-free for a lighter version)
- 1/2 cup chocolate chips (unsweetened or stevia-sweetened)
How to Make
- In a mixing bowl, combine peanut butter, chocolate chips, and milk.
- Whisk the mixture until well incorporated and the consistency is smooth.
- Sift in the protein powder gradually.
- Mix and fold until a dough forms with no lumps.
- Chill the dough in the refrigerator for 15-30 minutes until firm.
- Enjoy the dough as is or scoop it into balls or a bowl for easy serving.
Tips
- Adjust milk or protein powder to achieve desired dough consistency.
- Experiment with different flavors like chocolate or unflavored options.
- Use vegan protein powder and plant-based milk for a vegan-friendly version.
Customize it with your favorite protein powder flavors and enjoy the benefits of this healthier alternative to traditional cookie dough!
Full blog: Protein Cookie Dough

Cookie Dough Protein Balls
Another protein recipe! If you don’t want to commit to a whole bowl, try this cookie dough protein balls recipe that you can eat on the go or if you just want a quick snack.
Ingredients
- 1/2 cup drippy almond butter
- 1/2 cup almond flour
- 2 scoops collagen peptides
- 3 tablespoons maple syrup
- 1/2 teaspoon vanilla extract
- 1/4 teaspoon cinnamon (optional)
- 1/8 teaspoon salt
- 1/2 cup chopped dark chocolate or mini chocolate chips
How to Make
- In a large mixing bowl, combine almond butter, almond flour, and maple syrup. Stir until smooth.
- Add collagen peptides, vanilla extract, cinnamon (if using), and salt. Mix well.
- Gently fold in the chopped dark chocolate or mini chocolate chips.
- Scoop 1-2 tablespoons of the mixture and form into balls using your hands.
- Place the balls on a lined baking sheet and refrigerate until firm.
Tips
- Enjoy the protein balls on their own or as a topping for desserts.
- Store in an airtight container in the fridge for up to 2 weeks.
- Adjust the liquid-to-dry ingredient ratio to achieve the desired dough consistency.
- Experiment with different protein powders and nut butters to suit dietary preferences.
- Use vegan protein powder and plant-based milk for vegan-friendly option.
Full blog: Cookie Dough Protein Balls
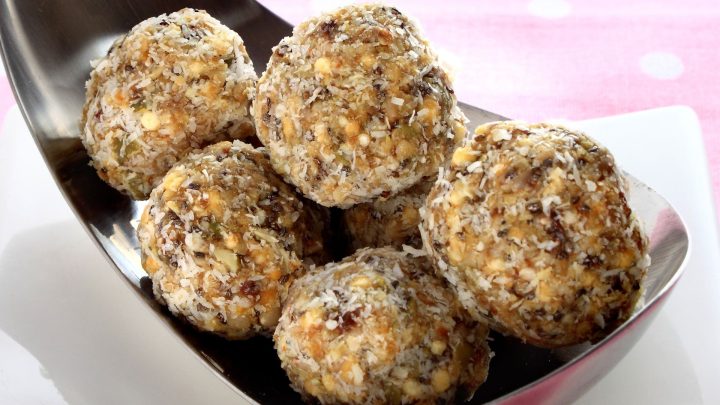
Cookie Dough Cake
Create a rich, moist, and decadent cookie dough cake with layers of edible cookie dough, buttercream frosting, and a delicious cake base. Perfect for special occasions if you don’t have a clue what to make as a sweet celebratory treat!
Ingredients
Cake Ingredients
- 1 box yellow cake mix, prepared
- 2 cups chocolate chips
Edible Cookie Dough Ingredients
- 4 cups flour, heat-treated
- 1 cup brown sugar
- 1 cup granulated sugar
- 4 sticks softened salted butter
- 4 tablespoons milk
- 2 teaspoons vanilla extract
- 2 teaspoons sea salt
- 1/2 cup mini chocolate chips
- 1/2 cup chopped chocolate chips
Buttercream Frosting Ingredients
- 2 1/2 sticks salted butter
- 2 1/2 cups powdered sugar
- 2 tablespoons heavy cream
- 1 teaspoon vanilla extract
How to Make
- Preheat oven to 350°F (175°C).
- Follow the instructions on the cake mix box, adding chocolate chips to the batter.
- Divide batter between two 8-inch cake pans, greased with cooking spray or oil.
- Bake according to box instructions. Allow to cool completely.
- In a bowl, cream together softened butter, brown sugar, and granulated sugar.
- Add milk and vanilla extract, mixing until well combined.
- Sift in heat-treated flour and salt, stirring until smooth.
- Fold in mini chocolate chips and chopped chocolate chips.
- Divide dough in half; chill one half in the fridge for layering. Roll remaining dough into small balls for decoration and chill.
- In a mixing bowl, beat together softened butter, powdered sugar, heavy cream, and vanilla extract until smooth.
- Place a dollop of frosting on a cake plate or stand to anchor the cake.
- Level the top of one cake layer and place it on the plate.
- Spread a layer of buttercream over the cake.
- Add the chilled cookie dough layer, followed by another layer of buttercream.
- Place the second cake layer on top, frost the entire cake, and adjust as needed.
- Decorate with chilled cookie dough balls. Slice and serve.
Tips
- Ensure the flour is heat-treated to kill any potential bacteria before using it in the edible cookie dough.
- Chilling the cookie dough helps it firm up and makes it easier to layer and shape.
- Use extra chocolate chips or sprinkles for additional decoration if desired.
Full blog: Cookie Dough Cake


Prices pulled from the Amazon Product Advertising API on:
Product prices and availability are accurate as of the date/time indicated and are subject to change. Any price and availability information displayed on [relevant Amazon Site(s), as applicable] at the time of purchase will apply to the purchase of this product.
Cookie Dough Baked Oats
For fans of baked oats, this one’s a delightful and versatile way to enjoy a healthy breakfast or snack.
Ingredients
- 1 cup old-fashioned oats
- 1/2 teaspoon baking powder
- 1/8 teaspoon salt
- 1 banana
- 2 tablespoons peanut butter
- 1 cup milk
- 1/8 teaspoon cinnamon (optional)
- 1/4 teaspoon vanilla extract
- 1/2 tablespoon maple syrup
- 1 tablespoon semi-sweet chocolate chips
- Semi-sweet chocolate chips
- Peanut butter
How to Make
- Preheat your oven to 350°F (175°C).
- Place oats, baking powder, salt, banana, peanut butter, milk, cinnamon, vanilla extract, and maple syrup in a blender. Blend until smooth.
- Pour the batter into a baking dish and gently fold in chocolate chips. Bake in the oven for about 30 minutes, or until the desired texture is achieved.
- Allow the baked oatmeal to cool for at least five minutes. Add optional toppings and slice to serve.
Tips
- Use old-fashioned oats for a chewier texture or quick oats for a smoother consistency.
- Only blend oats if specified in the recipe for desired consistency.
- Add extra chocolate chips on top for added sweetness and texture.
Full blog: Cookie Dough Baked Oats


Prices pulled from the Amazon Product Advertising API on:
Product prices and availability are accurate as of the date/time indicated and are subject to change. Any price and availability information displayed on [relevant Amazon Site(s), as applicable] at the time of purchase will apply to the purchase of this product.
Cookie Dough Mug Cake
Cookie dough mug cakes are quick, easy, and delicious treats that you can whip up in just a few minutes using a microwave and simple ingredients.
Ingredients
- 1 tablespoon softened butter
- 1 tablespoon brown sugar
- 1 tablespoon granulated sugar
- 1 egg, slightly beaten
- 1/3 cup heat-treated self-rising flour
- 1/8 teaspoon vanilla extract
- 4 tablespoons mini chocolate chips
- 2 tablespoons walnuts (optional)
How to Make
- In a microwavable mug, combine softened butter, brown sugar, and granulated sugar. Mix until pale and uniform.
- Add vanilla extract and stir, then add the slightly beaten egg and mix until incorporated.
- Sift in the self-rising flour and stir until smooth.
- Fold in the mini chocolate chips and walnuts if using.
- Microwave the mixture for 1 minute. If not fully cooked, microwave for an additional 30 seconds.
Tips
- Ensure the flour is heat-treated to kill any potential bacteria before using it in the mug cake.
- Avoid over-mixing to prevent dense texture in the healthier version.
- Adjust microwave times based on the wattage of your microwave.
Full blog: Cookie Dough Mug Cake

Cookie Dough Cake Filling
If you love cookie dough and cake, this cookie dough cake filling recipe will be perfect for you. It’s made with edible cookie dough layered between moist cake and topped with buttercream frosting.
Ingredients
Cookie Dough Filling
- 2 cups all-purpose flour
- 1 cup salted butter, softened
- 3/4 cup packed dark brown sugar
- 1/2 cup granulated sugar
- 1/8 teaspoon ground cinnamon (optional)
- 1/8 teaspoon salt
- 1–2 tablespoons milk
- 1/2 teaspoon vanilla extract
- 3/4 cup chocolate chips
Cake Layers
- 3 cups all-purpose flour
- 3 cups granulated sugar
- 2 1/2 teaspoons baking powder
- 1/2 teaspoon salt
- 2 sticks salted butter, softened
- 7 egg whites
- 1 1/2 cups yogurt
- 2 tablespoons olive oil
- 2 teaspoons vanilla extract
- 1 cup chocolate chips
Frosting
- 2 sticks butter, softened
- 3 teaspoons pure vanilla extract
- 4 cups powdered sugar
- Milk as needed (usually 2 tablespoons)
How to Make
Cookie Dough Cake Filling
- Heat Treat Flour:
- Preheat the oven to 350°F (175°C).
- Spread flour on a baking sheet and bake for 7-10 minutes or until the flour reaches 165°F (75°C) to kill any bacteria.
- Allow flour to cool completely.
- Make Cookie Dough:
- Beat softened butter and sugars together until fluffy.
- Add vanilla extract, salt, and heat-treated flour. Mix until incorporated.
- Add milk one tablespoon at a time until the dough reaches the desired consistency.
- Fold in chocolate chips.
- Divide cookie dough into thirds, pressing two-thirds into two cake pans lined with plastic wrap.
- Refrigerate until firm. Once firm, remove, wrap in plastic, and store in the fridge.
Cake Layers
- Prepare Batter:
- Mix dry ingredients: flour, sugar, baking powder, and salt.
- Add wet ingredients: butter, egg whites, yogurt, olive oil, and vanilla extract.
- Fold in chocolate chips.
- Bake Cake:
- Divide batter into three cake pans.
- Bake at 350°F (175°C) for 35 minutes.
- Allow to cool for 15 minutes, then freeze for 1 hour before assembly.
Buttercream Frosting
- Combine butter, powdered sugar, vanilla extract, and milk.
- Beat until smooth, adjusting consistency with more milk if needed.
Assembly
- Remove cake layers from the freezer and cookie dough from the fridge.
- Place the first cake layer on a plate with a dollop of frosting in the center.
- Add a layer of cookie dough, followed by another cake layer.
- Repeat with remaining layers, flipping the final cake layer upside down.
- Frost the cake with a thin layer of buttercream and freeze for 5 minutes.
- Add a second thicker layer of frosting.
- Decorate with cookie dough balls and chocolate chips.
- Store in the fridge for up to 5-7 days or at room temperature for 1-2 days.
Tips
- Ensure the flour is heat-treated to eliminate bacteria.
- This tool helps in spreading frosting and layers evenly.
- Have plastic wrap and cake pans ready for forming layers.
- Sprinkle over ice cream or use in cookie dough frosting.
- Enjoy it on its own as an edible treat.
- Try it with chocolate cake or add sprinkles and crushed cookies for customization.
Full blog: Cookie Dough Cake Filling

Cookie Dough Cake Pops
A delightful way to enjoy the taste of cookie dough in a fun, handheld treat. Perfect for parties, gatherings, or to simply enjoy at home!
Ingredients
- For the Cookie Dough
- 1 3/4 cup heat-treated all-purpose flour
- 2 sticks of butter, softened
- 3/4 cup granulated sugar
- 1 cup packed light brown sugar
- 1 1/2 teaspoons vanilla extract
- 1/4 teaspoon salt
- 1/2 cup rainbow sprinkles
- For Coating
- 1 cup + 2 tablespoons pink candy melting wafers
- Sprinkles for decoration (optional)
How to Make
- Preheat your oven to 350°F (175°C).
- Spread flour evenly on a baking sheet and bake for 7-10 minutes to kill bacteria.
- Allow flour to cool completely before use.
- In a large bowl, beat the softened butter with granulated and brown sugar until light and fluffy.
- Add vanilla extract and salt, mixing until well combined.
- Gradually add cooled, heat-treated flour, mixing until dough forms.
- Stir in rainbow sprinkles.
- Portion dough into 1 1/2-tablespoon balls.
- Place on a lined baking sheet and refrigerate for up to 25 minutes.
- Follow the package instructions to melt candy wafers.
- Prepare a station with a box or styrofoam to hold the cake pops upright as they cool.
- Dip one end of each lollipop stick into melted candy, then insert into a cookie dough ball.
- Dip each cookie dough ball into the melted candy, ensuring it is fully coated.
- Allow excess to drip off, then add additional sprinkles if desired.
- Insert sticks into the prepared station and let harden.
Tips
- Enjoy immediately or store in an airtight container in the refrigerator for up to 3 days.
- Freeze leftovers for up to 2-3 months.
- Use cake mix to prepare the dough, bake, crumble, and mix with frosting before forming balls.
- Add 1/4-1/2 cup chocolate chips to the dough.
- Use chocolate melting wafers for coating.
- Heat treating eliminates bacteria and make the dough safe to eat.
- Chilling makes sure the dough holds its shape when dipping in the coating.
- Helps spatula spreading coating evenly on cake pops.
Full blog: Edible Cookie Dough Cake Pops

Cookie Dough Brownies
The perfect combination of chewy brownies and rich cookie dough, topped with a decadent layer of chocolate.
Great for those who love both cookies and brownies but can’t decide between the two.
Ingredients
Brownie Layer
- 2 sticks of butter, melted and cooled
- 1 cup unsweetened cocoa powder
- 2 cups granulated sugar
- 1/2 cup packed light brown sugar
- 3/4 teaspoon sea salt
- 1/2 teaspoon baking powder
- 3 large eggs, beaten
- 1 1/2 teaspoons vanilla extract
- 1 1/4 cups all-purpose flour
- 1/2 cup white chocolate chips (optional)
Cookie Dough Layer
- 1 cup butter, at room temperature
- 1 cup packed brown sugar
- 1/2 cup granulated sugar
- 1/2 teaspoon kosher salt
- 1/4 cup milk
- 2 teaspoons vanilla extract
- 2 cups all-purpose flour, heat-treated
- 1 cup chocolate sprinkles
Chocolate Topping
- 1 cup chocolate chips
- 2 tablespoons shortening
How to Make
- Preheat your oven to 350°F (175°C).
- In a large bowl, mix melted and cooled butter with cocoa powder, granulated sugar, and brown sugar.
- Stir in sea salt, baking powder, beaten eggs, and vanilla extract.
- Sift in all-purpose flour and fold in white chocolate chips, if using.
- Pour the brownie batter into a greased 9×13-inch baking dish and bake for 19-24 minutes. Let cool completely.
- Spread flour on a baking sheet and bake at 350°F (175°C) for 7-10 minutes. Let cool completely.
- In a large bowl, cream butter and sugars until light and fluffy using a hand mixer.
- Add vanilla extract, salt, milk, and heat-treated flour. Stir until combined.
- Gently fold in chocolate sprinkles.
- Use an offset spatula to evenly spread the cookie dough over the cooled brownies.
- Refrigerate the brownie and cookie dough layer for about 30 minutes until firm.
- In a small saucepan, melt chocolate chips with shortening until smooth.
- Spread the melted chocolate over the cookie dough layer evenly.
- Refrigerate for another 20 minutes until the chocolate sets.
Tips
- Use a boxed brownie mix for the brownie layer for a quicker option
- Try using different types of cookie dough, such as chocolate chip, snickerdoodle, or peanut butter.
- Add nuts, toffee bits, or crushed candy on top for extra texture.
- Always heat treat flour to kill any potential bacteria.
- Ensure layers are firm by chilling at each step.
Full blog: Cookie Dough Brownies
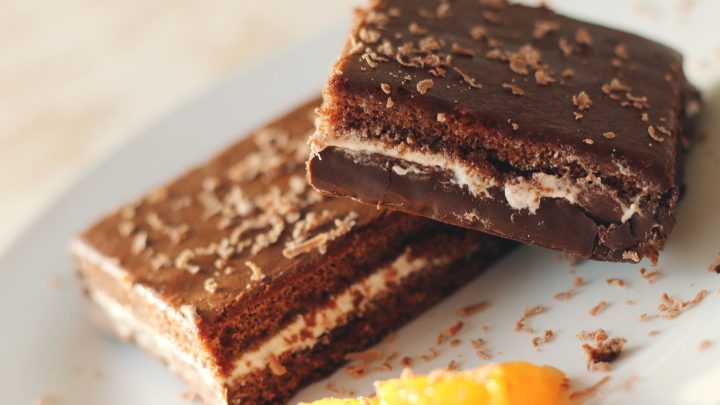
Cookie Dough Cheesecake
This one’s a luscious combination of two beloved desserts—cookie dough and cheesecake. This no-bake cheesecake is rich and creamy. With layers of chocolate chip cookie dough and a creamy cheesecake filling, it’s a dessert that’s hard to resist!
Ingredients
Chocolate Chip Cookie Crust
- 2 1/4 cups chocolate chip cookie crumbs
- 1 teaspoon vanilla
- 1/4 teaspoon cinnamon
- 1/2 cup butter, melted
Cookie Dough
- 1/2 cup butter
- 1/4 cup brown sugar
- 1/2 cup granulated sugar
- 2 tablespoons milk
- 1 teaspoon vanilla extract
- 1/8 teaspoon salt
- 3/4 cup all-purpose flour, heat-treated
- 1/2 cup mini chocolate chips
Cheesecake Base
- 32 ounces of cream cheese, room temperature
- 1/2 cup granulated sugar
- 1/2 cup brown sugar
- 2/3 cup yogurt
- 2 teaspoons vanilla extract
- 1/4 teaspoon salt
- 4 eggs, slightly beaten
- 1 cup mini chocolate chips
Chocolate Ganache
- 1 cup semi-sweet chocolate chips
- 1/2 teaspoon vanilla
- 1/2 cup heavy whipping cream
Cinnamon Whipped Cream
- 1 cup heavy whipping cream
- 2 tablespoons powdered sugar
- 1/2 teaspoon vanilla extract
- 1/8 teaspoon ground cinnamon
How to Make
- In a mixing bowl, combine chocolate chip cookie crumbs, melted butter, vanilla, and cinnamon.
- Press the mixture firmly into the bottom of a 9-inch cake pan.
- Refrigerate for 15 minutes while you prepare the rest of the recipe.
- Preheat your oven to 350°F. Spread flour on a parchment-lined baking sheet and bake for 7-10 minutes. Let it cool completely.
- In a mixing bowl, beat butter, brown sugar, and granulated sugar until light and fluffy.
- Add milk, vanilla extract, and salt. Mix until combined.
- Sift in cooled flour and fold in mini chocolate chips.
- Roll small bits of dough into balls and place on a parchment-lined baking sheet. Refrigerate for 30-40 minutes until firm.
- Beat cream cheese, granulated sugar, brown sugar, yogurt, and vanilla extract until smooth.
- Stir in salt, beaten eggs, and mini chocolate chips.
- Preheat your oven to 325°F.
- Mix cookie dough balls into the cream cheese mixture.
- Pour the mixture over the chilled cookie crust.
- Place the cake pan in a larger pan filled halfway with water. Cover with foil.
- Bake for 75-80 minutes. The center will be slightly jiggly.
- Allow the cheesecake to cool in the oven with the door ajar for 25-30 minutes.
- In a saucepan over low-medium heat, melt chocolate chips with heavy cream and vanilla until smooth. Set aside to cool slightly.
- Beat heavy whipping cream, powdered sugar, vanilla extract, and cinnamon until peaks form. Chill until ready to use.
- Refrigerate the cheesecake for 5 hours or overnight.
- Drizzle chocolate ganache over the cheesecake, top with remaining cookie dough balls if desired, and serve each slice with a dollop of whipped cream.
Tips
- Full-fat cream cheese and yogurt ensure a rich and creamy texture.
- If the cookie dough is too thick, add more milk; if too thin, add a bit more flour.
- The water bath prevents the cheesecake from cracking
Full blog: Cookie Dough Cheesecake

Cookie Dough Cupcakes
Cookie dough cupcakes are a delightful combination of moist vanilla cupcakes loaded with mini chocolate chips and topped with a luscious cookie dough frosting.
Guaranteed to satisfy your cravings for both cookies and cupcakes in one delicious bite.
Ingredients
For the Cupcakes
- 1 stick unsalted butter
- 1/4 cup white sugar
- 3/4 cup brown sugar
- 1/4 cup neutral oil
- 2 large eggs
- 2 teaspoons vanilla
- 1/2 cup yogurt
- 1 1/2 cups all-purpose flour
- 3/4 teaspoon salt
- 1 1/2 teaspoons baking powder
- 20 ounces mini chocolate chips
For the Frosting
- 2 sticks of butter
- 1/2 cup packed brown sugar
- 1/2 cup white sugar
- 1 cup powdered sugar
- 4 teaspoons vanilla
- 5 tablespoons heavy cream
- 1 cup heat-treated all-purpose flour
- 3/4 teaspoon salt
- 1 cup mini chocolate chips
How to Make
- Preheat your oven to 350 degrees Fahrenheit.
- Line a muffin tin with muffin liners. This recipe makes approximately 18 cupcakes.
- In a large bowl, cream together brown sugar, white sugar, and butter using a hand mixer until pale and fluffy, about 2 minutes.
- Incorporate the neutral oil, ensuring it doesn’t alter the flavor of the cupcakes.
- Mix in partially beaten eggs and pure vanilla extract until fully combined.
- Add yogurt and mix until well incorporated.
- Sift in flour, salt, and baking powder. Mix well, scraping down the sides of the bowl, until all ingredients are combined.
- Gently fold in the mini chocolate chips.
- Scoop about 4 teaspoons of batter into each muffin liner, adjusting if necessary to prevent overflow.
- Bake in the center of the oven for 17-20 minutes, checking for doneness by inserting a toothpick into the center. Cool completely on a wire rack after letting them stand for 2-3 minutes.
- In a large bowl, beat 2 sticks of butter with brown and white sugar using a hand mixer until light, pale, and fluffy.
- Mix in vanilla, powdered sugar, and heavy cream until incorporated.
- Preheat oven to 375 degrees Fahrenheit. Spread flour evenly on a lined baking sheet and bake for 7-10 minutes. Allow to cool completely.
- Sift heat-treated flour into the butter and sugar mixture, add salt, and beat until well combined.
- If needed, add more heavy cream to achieve a frosting-like consistency.
- Use a frosting tip and pastry bag (or a plastic freezer bag with the corner cut off) to pipe frosting onto each cupcake. Alternatively, use a knife to spread frosting.
- Store unfrosted cupcakes in an airtight container in the fridge or freezer, with frosting stored separately, to be applied just before serving.
Full blog: Cookie Dough Cupcakes

Healthy Cookie Dough Dip
Looking for an amazing healthy cookie dough dip? This recipe is simple, quick, and satisfies without extra calories and fats.
Ingredients
- 2 cups plain yogurt
- 4 tablespoons smooth peanut butter
- 6 tablespoons mini chocolate chips
- 2 tablespoons maple syrup
- 1 teaspoon vanilla extract
- 1/4 teaspoon cinnamon
How to Make
- In a mixing bowl, combine 2 cups of yogurt with 4 tablespoons of smooth peanut butter. Stir with a spoon until smooth.
- Add 2 tablespoons of maple syrup (or substitute with honey), 1 teaspoon of vanilla extract, and 1/4 teaspoon of cinnamon to the yogurt mixture. Mix until well combined.
- Gently fold in 6 tablespoons of mini chocolate chips. You can also add other mix-ins of your choice.
- Transfer the healthy cookie dough dip into a serving bowl and refrigerate. It’s recommended to serve chilled, but you may also enjoy it at room temperature.
Tips
- Mini chocolate chips can be substituted with white chocolate chips, chopped dark chocolate, or peanut butter morsels.
- For a brownie batter-flavored dip, consider adding 2 tablespoons of cocoa powder and a handful of walnuts (optional).
What to Dip in Healthy Cookie Dough
Enhance your cookie dough dip experience by pairing it with a variety of dippable snacks.
- Apple slices
- Graham crackers
- Pretzels
- Strawberries
- Bananas
- Animal crackers
- Vanilla wafers
- Celery and carrots
- Crackers
Full blog: Healthy Cookie Dough Dip

Lisa Frank Cookie Dough
It bakes up soft, sweet, and oh-so-cute. Not to mention, my inner ’90s kid comes out whenever I hear “Lisa Frank”.
Ingredients
- 1 cup butter, softened
- 1 cup sugar
- 1 large egg
- 2 1/2 teaspoons vanilla extract
- 2 1/4 cups all-purpose flour
- 1/2 teaspoon salt
- Neon pink gel food coloring
Equipment
- Small unicorn shape cutter (do not use a large one)
- Plastic wrap
How to Make
- Beat your butter and sugar until it becomes pale and fluffy.
- Add in your egg and vanilla and stir until well incorporated.
- Sift your flour and salt into the mixture and stir until integrated.
- Take 1/3 of your dough and form it into a ball. Use a finger to make a small divot in the dough. This is where you’ll add the food coloring.
- Add your neon pink food coloring to the small hole you made. Add the food coloring until it reaches the color you desire. Since Lisa Frank unicorns are a deep hue of hot pink, we recommend adding at least 3-4 drops.
- Using gloved hands, carefully mix the food coloring throughout the dough until the dough forms a solid color.
- Flatten your dough (does not have to be perfect), wrap it in plastic wrap, and freeze it for at least 60 minutes or until very firm.
- In the meantime, roll out your uncolored dough into a rectangle. The width of the rectangle should reflect how long you want your sugar cookie dough loaf to be.
- Once your colored dough has firmed, remove it from the freezer. Take your unicorn shape cutter and begin to cut out unicorn shapes. Once they are cut, carefully stack each print on top of one another, ensuring that they match in shape and are carefully and precisely placed. Freeze the entire stack for 20 minutes or until firm.
- Take your frozen stack of unicorn shape cutouts and place them at the top middle of your uncolored dough width-wise. Begin to roll your uncolored sugar cookie dough over the cutouts carefully. Alternatively, you can cut your uncolored dough into strips and carefully wrap the strips around your stack of unicorns. Just make certain that your unicorn shape stack is firm when doing this part. Otherwise, they’ll be too soft and the unicorn shapes will turn out unrecognizable when baked.
- Once rolled, place the entire sugar cookie loaf in the freezer for three hours or so until firm.
- Remove the cookie dough loaf from the freezer, and slice into 1/4-inch rounds. Place cookie dough rounds on parchment paper. Note: We don’t recommend that you microwave cookie dough as a substitute for baking it.
- Cook the dough at 350 degrees Fahrenheit for about 10 minutes or until the edges are golden brown.
- Remove and let stand for at least 2 minutes before digging in.
- Serve with ice-cold milk. Enjoy!
Full blog: Lisa Frank Cookie Dough


Prices pulled from the Amazon Product Advertising API on:
Product prices and availability are accurate as of the date/time indicated and are subject to change. Any price and availability information displayed on [relevant Amazon Site(s), as applicable] at the time of purchase will apply to the purchase of this product.
Grinch Cookie Dough
If you love “The Grinch,” then you’ll ADORE this Grinch cookie dough. Of course, the Grinch is a fictional character most think about during the holidays, but trust me, this delicious Grinch cookie dough recipe is one you’ll want to make all year round.
Ingredients
- 1/2 stick of butter, softened
- 2 tablespoons granulated sugar
- 2 tablespoons brown sugar
- 2 teaspoons pure vanilla extract
- 3/4 cup all-purpose flour
- 1/8 teaspoon salt
- 1-2 tablespoons milk
- 2-3 tablespoons white chocolate chips
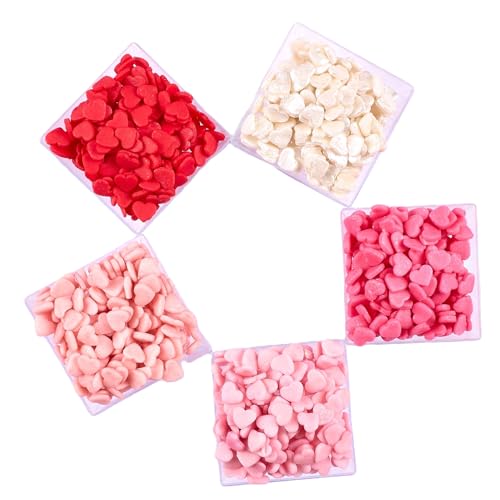
- Heart sprinkles
How to Make
For Heat Treating Flour
- Evenly sprinkle your flour across a prepared baking sheet.
- Heat at 350 degrees Fahrenheit for 7-10 minutes.
- Remove from the oven and allow to cool completely before continuing with the recipe as follows.
Making the Edible Grinch Cookie Dough
- Grab a large mixing bowl. Beat your butter and sugar with a hand mixer until light and fluffy.
- Add your vanilla extract.
- Mix in your salt, flour, and a few drops of green food coloring until you reach the desired shade of green.
- Use 1-2 tablespoons of milk to loosen up the dough. Try not to add more milk than this, as it can make your cookie dough sticky or runny.
- Gently fold in the white chocolate chips.
- Use a cookie dough scoop or tablespoon to portion your dough into small balls and arrange on a lined baking sheet. Alternatively, you can place your cookie dough in the refrigerator to be chilled without portioning it.
- Chill for 30 minutes to an hour. If you choose not to pre-portion your dough, use an ice cream scoop or large cookie dough scoop to dish the cookie dough into bowls.
- When ready to serve, gently press in your heart sprinkles on the areas desired for added effect. Enjoy!
Full blog: Grinch Cookie Dough




Prices pulled from the Amazon Product Advertising API on:
Product prices and availability are accurate as of the date/time indicated and are subject to change. Any price and availability information displayed on [relevant Amazon Site(s), as applicable] at the time of purchase will apply to the purchase of this product.
Vegan Chickpea Cookie Dough
Chickpea cookie dough is an edible cookie dough option with a unique and healthy twist. It not only utilizes nutritious chickpeas as the base for the recipe, but it is also incredibly versatile.
So, what is it about chickpea cookie dough that makes it so enticing?
Ingredients
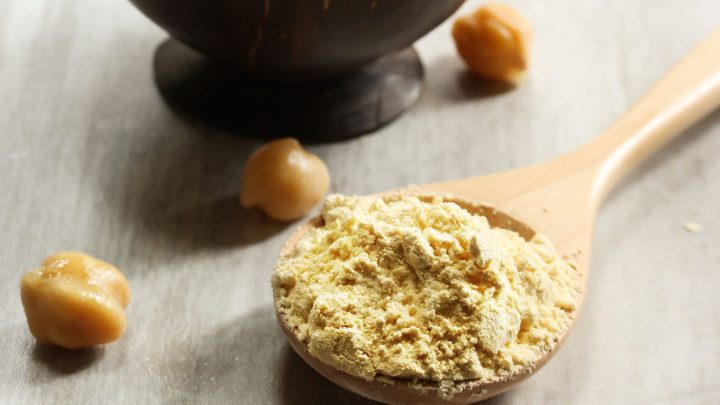
- 3 cups canned chickpeas (remove the chickpea skin if desired, but not really necessary)
- 1/2 cup vegan peanut butter
- 2 teaspoons pure vanilla extract
- 1/2 cup almond flour
- 5–6 tablespoons of pure maple syrup (make sure you aren’t using pancake syrup… the two aren’t the same!)
- 1/2 cup high-quality miniature chocolate chips
- 1 1/2 teaspoon sea salt
How to Make
- Start by blending your canned chickpeas in a blender until they resemble the texture of a smooth paste. Alternatively, you can cream your chickpeas using a food processor if you don’t have a blender on hand.
- To this mixture, combine your peanut butter, vanilla extract, sea salt, cinnamon (if using), and maple syrup. Blend for a few seconds until combined.
- Using a rubber spatula, transfer your blender mixture into a large mixing bowl.
- Sift your almond flour into the mixture and stir until thick and incorporated.
- Carefully fold in your chocolate chips.
Tips
- Always ensure you rinse your canned peas really, really, REALLY well!
- Alternatively, you can cook your chickpeas from dry.
- Remove the skin from the chickpeas only if you wish. It will make the cookie dough much smoother, but this step isn’t really necessary.
- Feel free to substitute honey instead of maple syrup when making chickpea cookie dough. Both are healthful choices!
- If you use regular salt instead of sea salt, reduce the amount to 1 teaspoon.
How to Use
Use your healthy chickpea cookie dough in a variety of ways, including:
- As a healthy cookie dough dip for apple slices, carrots, or celery sticks
- As a fun topper for ice cream
- As a side dish to your favorite salty snack
- Smeared on crackers or bagels
- Crumbled over cake frosting or cupcakes
Full blog: Chickpea Cookie Dough
Almond Flour Cookie Dough
Almond flour recipes are common in the keto and low-carb community. But make no mistake, almond flour cookie dough bites can be some of the best and most nutritious snack choices around.
Ingredients
- 3 tablespoons coconut oil, melted then cooled
- 3/4 cup almond flour
- 3 tablespoons pure maple syrup
- 3/4 teaspoons vanilla extract
- 1/2 teaspoons sea salt
- 1/3 cup chopped dark chocolate or mini chocolate chips
How to Make
- Combine your melted then cooled coconut oil with your maple syrup, vanilla extract, and salt. Stir until well combined.
- Pour in your almond flour and mix until incorporated.
- Add 1/3 cup of chocolate chips or chopped dark chocolate and fold in gently.
- Portion your cookie dough into little bite-sized balls by rolling the dough between the palms of your hands. Use 1.5 tablespoons of dough for the perfect size or use cookie scoops instead.
- Place the dough on a prepared baking sheet and chill for at least 30 minutes or until firm. You may also consume these cookie dough balls at room temperature if desired.
Tips
- Feel free to forgo pre-portioning any of these recipes. Instead, you may refrigerate the entire dough and use an ice cream scoop to scoop the cookie dough into a bowl. When enjoying your almond flour cookie dough this way, you would treat it the same way you would ice cream by eating it with a spoon.
- Suggestions for swappable vegan ingredients include: Vegan chocolate chips, vegan butter, plant-based milk, and vegan sprinkles.
Full blog: Almond Flour Cookie Dough






Prices pulled from the Amazon Product Advertising API on:
Product prices and availability are accurate as of the date/time indicated and are subject to change. Any price and availability information displayed on [relevant Amazon Site(s), as applicable] at the time of purchase will apply to the purchase of this product.
Cauliflower Cookie Dough
If you’re anything like me, cauliflower cookie dough sounds like a terrible idea. Trust me, I know. However, you may be surprised to know that you can turn an otherwise icky idea into a totally mouth-watering dessert that’s chock full of nutrients to help get you through your day.
Ingredients
- 2 cups cauliflower florets
- 1/4 cup whole ground flax
- 1/2 cup shredded coconut
- 1 tbsp unsweetened cocoa powder
- 1/4 teaspoon cinnamon
- 1 tsp baking powder
- 1/2 tsp sea salt
- 1/2 cup pure maple syrup
- 1/4 cup semi-sweet chocolate chips (or chopped dark chocolate if you prefer)
How to Make
- Steam your cauliflower in a steaming basket until the cauliflower turns tender. Allow to cool.
- Preheat your oven to 375 degrees Fahrenheit. Line a baking sheet with parchment paper and set aside.
- In a food processor, combine your cooked cauliflower, ground flax, shredded coconut, cocoa powder, cinnamon, baking powder, salt, and maple syrup. Process the ingredients until they are fully incorporated.
- Open the top of your food processor. Stir in your semi-sweet chocolate chips.
- Use a cookie scoop to carefully portion the dough onto your prepared baking sheet. Make sure you give plenty of room for spread. In the event that you don’t have a cookie scoop, rolling 1 1/2 tablespoons of dough between your hands will produce similar results.
- Bake the cookies for 32-36 minutes in your preheated oven. Be sure to watch for burning.
- After you’ve removed the cookies, you’ll want to allow them to cool for at least half an hour. Though this may be difficult, eating them sooner than this may cause your cookie to crumble.
Tips
- Remember when tasting the cookies that they will be softer than what you’re used to due to their unique ingredients. The middle may even look wet when you bite into it. As long as you’ve portioned the cookies correctly and have cooked them for the specified amount of time, you shouldn’t have an issue with undercooked cookie dough.
- These are best eaten within 3 days. For longer keep times, try portioning the cookie dough for up to 2 months at best quality.
- Enjoy with milk.
Full blog: Cauliflower Cookie Dough
Cookie Dough Flautas
A cookie dough flautas recipe? What?! I know what you’re thinking. It’s interesting, right? Well, not only is this recipe interesting, but it is equally delicious. The most amazing thing about this recipe is that you can whip it up in only a few minutes.
Ingredients
- 1 pack of store-bought chocolate chip cookie dough
- 1 pack of flour tortillas
- Neutral-flavored oil (optional, for brushing over tortillas)
- Powdered sugar (optional, for serving)
- Chocolate sauce (optional, for serving)
How to Make
- Preheat your air fryer to 400 degrees Fahrenheit.
- Open a flour tortilla. Using a spoon, smear a good amount (about 2-3 tablespoons) of the cookie dough in the center of the tortilla. Be careful not to add too much cookie dough, as this may result in the cookie dough becoming underbaked.
- Roll your tortilla over the dough and place the flauta seam side down. Repeat these steps with all your tortillas.
- Carefully brush a bit of light oil over the rolled tortillas if you wish. This will make them crispier, but this step is optional.
- Place your flautas in the air fryer basket and fry for about 5 minutes. Check to prevent burning. Note: when placing your flautas in the air fryer basket, be sure not to overcrowd them. Overcrowding leads to less crispy results.
- Remove from the air fryer and let it cool. Serve up warm with powdered sugar and drizzled chocolate sauce, or chill for a cool treat.
Full blog: Cookie Dough Flautas
Keto Cookie Dough
Keto cookie dough may sound like an anomaly of sorts, but in actuality, it totally exists. Using a few common food ingredients, you can come up with deliciously amazing cookie dough bites chock full of flavor and healthy fat with zero carbs!
Ingredients
- 2 cups almond flour
- 1 cup smooth peanut butter
- 1/2 cup butter
- 1 teaspoon vanilla
- 1/8 teaspoon cinnamon, optional
- 2/3 cup confectioners powder (sugar-free variety)
- 2/3 cup sugar-free chocolate chips
How to Make
- Combine your peanut butter, butter, vanilla, and cinnamon in a bowl. Mix until fully blended, preferably with a hand mixer.
- Sift in your sugar-free confectioners powder.
- Gently fold in your chocolate chips.
- Scoop your cookie dough using a cookie dough scoop or tablespoons and roll into evenly sized balls.
- Place the keto cookie dough bites on parchment-lined paper.
- Chill or serve cookie dough immediately.
Mixin Ideas for Keto Cookie Dough
To prevent a spike in net carbs in these no-bake recipes, try the following mix-ins instead of traditional ones:
- Unsweetened shredded coconut
- Keto chocolate chips
- Keto sprinkles
- Sugar-free candies
- Low carb dried fruits
- Nuts
Full blog: Keto Cookie Dough
Cookie Dough Ice Cream Cake
Cookie dough ice cream cake is a decadent way to enjoy cookie dough, cake, and ice cream all at the same time! Though cakes like these tend to take quite a few steps, the end results are totally worth it.
Ingredients
Vanilla Cake
- 1 1/3 cup all-purpose flour
- 1/2 cup white granulated sugar
- 1/4 cup brown sugar
- 1 teaspoon baking powder
- 1/2 teaspoon baking soda
- 3/4 teaspoon sea salt
- 4 tablespoons of butter, melted then cooled
- 1 teaspoon vanilla extract
- 2 eggs
- 1 cup milk
- Olive oil, for greasing pans
Ice Cream
- At least 1.5 quarts of cookie dough ice cream
Edible Cookie Dough
- 3/4 cup heat-treated all-purpose flour
- 1/4 cup butter, room temperature
- 1/8 teaspoon salt
- 1/4 cup + 2 tablespoons brown sugar, packed
- 1 tablespoon milk
- 1 tablespoon maple syrup
- 1 teaspoon vanilla extract
- 1/4 cup rough chopped dark chocolate (or traditional miniature chocolate chips)
Whipped Cream
- 3 cups heavy cream
- 6 tablespoons confectioners’ sugar
- 3 teaspoons vanilla extract
Chocolate Sauce (optional)
- 1 cup chopped dark chocolate
- 1 cup heavy cream
Equipment
- Two 9-inch cake pans (also known as “springform pan”)
- Two 8-inch cake pans (also known as “springform pan”)
- Cake board (for presentation and decorating the cake)
- Mixing bowls
- Off-set spatula
- Foil
- Parchment paper
- Plastic wrap
- Optional pastry bag (for piping whipped cream and chocolate sauce)
How to Make
Vanilla Cake
- Start by preheating your oven to 350 degrees Fahrenheit.
- Lightly coat each cake pan with olive oil using a paper towel. Line with parchment paper and oil again. You can alternatively use cooking spray here for less mess.
- In a mixing bowl add flour, sugar, baking powder, baking soda, and sea salt. Whisk until combined.
- In a separate bowl, beat your eggs and add your melted butter (only after it has cooled). Include your vanilla extract along with your milk and mix until well incorporated.
- Combine your wet ingredients with your dry ingredients and whisk thoroughly. Allow to sit for 5 minutes. It’s okay if the cake batter appears a bit liquidy at this point.
- Evenly distribute your cake batter into your two lined cake pans.
- Place in the oven and bake for around 21-26 minutes, depending on your oven. Rotate the two pans if needed to ensure even baking. Be sure to check it around the 19-minute mark to ensure it isn’t burning. Use a toothpick to determine whether or not it is done; the toothpick should come out clean after being inserted.
- Allow the cakes to cool completely.
- Turn them out of their cake pans, wrap them, put them in freezer bags, and place them in the freezer. Allow the two cake layers to freeze overnight.
Ice Cream Layer
- While the cake layers are freezing, you’ll want to prepare your cookie dough ice cream. First, you’ll want to allow the ice cream to sit and soften. You can allow your ice cream soften in about 20-30 minutes by just leaving it to sit on your counter.
- As your ice cream is softening, use foil to line the bottom of an 8-inch cake pan.
- Use a rubber spatula to carefully smooth your now softened ice cream into the foil-lined cake pan.
- Wrap carefully with plastic wrap and place into your freezer on a level surface. Keep frozen until it is ready to use, preferably overnight.
Edible Cookie Dough Recipe
- Before making your edible cookie dough, remember that you must heat treat the flour before using.
- To do this, preheat your oven to 350 degrees Fahrenheit (FC). Sift your flour evenly over a lined baking sheet and bake for approximately 7-10 minutes (be careful not to burn).
- Remove the flour from the oven and allow it to cool completely.
- Once the flour has completely cooled down, set it aside.
- Cream together your butter and brown sugar until it becomes a thick, fluffy, and pale consistency. If there is too little butter and sugar to use a hand mixer, you may choose to stir it by hand, though you won’t achieve as fluffy of results.
- To this, add your vanilla extract along with your maple syrup.
- Sift in your heat-treated flour and salt. Mix.
- Add a tablespoon of milk to help the dough achieve the right consistency.
- Chop your dark chocolate (if using) or dump in your miniature chocolate chips. Stir until just combined.
- Add parchment paper to the bottom of an 8-inch cake pan and gently press 80% of your cookie dough into the pan until it forms an even layer. This works as your cookie dough crust for your ice cream cake. Roll the other 20% of your cookie dough into the same or different sized balls. You’ll use these later to decorate your cake.
- Chill both the cake pan cookie dough layer and the cookie dough balls in the fridge until firm (usually a little over an hour).
Whipped Cream
- Before you are ready to assemble your cake, make your whipped cream.
- To do this, start with a clean mixing bowl. Pour your heavy whipping cream into the bowl and beat with a hand mixer until the mixture begins to thicken.
- Once the mixture begins to thicken slightly add your powdered sugar along with the vanilla extract. Continue beating until stiff peaks form.
- Cover with plastic wrap while still in the bowl, and chill in the fridge until ready for use.
Chocolate Sauce
- Gently heat your heavy cream in a saucepan until you see steam emitting from the surface. Be careful not to burn or scald the milk.
- Roughly chop your dark chocolate or simply pour 1 cup of chocolate chips into a bowl.
- Pour your warm heavy cream over top of the chocolate.
- Stir the two together until it forms a smooth sauce. If the sauce appears too runny, add a bit more chocolate. Otherwise, allowing it to sit for a bit may cause it to thicken slightly.
- Reheat by placing in the microwave at 10-15 second intervals to help make the sauce smooth again.
- Allow the sauce to cool completely before using it to decorate your cake.
Assembling
- Use a rubber spatula to place a small amount of whipped cream on your cake board.
- Remove your cake layers from the freezer. Take the first one and lay it on top of the whipped cream-covered cake board.
- Use your rubber spatula to smooth approximately 1 cup of whipped cream over the cake layer.
- Remove your cookie dough layer from the fridge. Place it on top of the cake layer. Use whipped cream to fill in the edges where there might be gaps between the cake and the cookie dough layer. Smooth with an off-set spatula if you have one, or use a knife.
- Moving quickly, remove the ice cream pan from the freezer. Carefully lift this layer and place it on top of the cookie dough layer.
- Swiftly flip the last cake layer upside down (bottom up) and place on top of the cookie dough vanilla ice cream.
- Use your off-set spatula to smooth more whipped cream over the entire cake. Again, work quickly to ensure the ice cream layer doesn’t begin to melt.
- Use your chocolate in whatever way you choose to decorate your cake. Allow it to drip slightly over the edges of the cake for a luxuriously decadent look.
- Then, take your extra cookie dough balls to decorate the top of the cake.
- Wrap the cake and freeze for about 30 minutes to ensure everything sets.
- If too firm upon retrieval from the freezer, allow about 10 minutes before slicing in. Enjoy!
Tips
- Feel free to take breaks during the assembly segment of the cake making to keep the ice cream layer from melting. For example, after putting on the ice cream layer, you could totally wrap the cake and place it in the freezer as you whip up the chocolate sauce. This will keep the ice cream cold and frozen while you do other things. If you choose not to intermittently freeze your cake, just be sure to move VERY quickly to avoid the ice cream melting and ruining the cake.
- You should feel free to use the ice cream of your choosing in this recipe. Though this is technically a cookie dough ice cream cake, you could totally use a unique flavor like chocolate to change things up a bit. You can also use dairy-free ice cream if you wish or other alternatives as well. I’ve seen some recipes even use cream cheese filling instead of icing … the world is your oyster, and it’s your cake. Get creative!
- If you don’t want to fuss with another 8-inch pan when making your cookie dough layer, you could alternatively break the cookie dough apart and spread it over your cake before layering on the ice cream and the final cake layer at the very end. I choose to do a thick cookie dough layer for more decadence, but breaking up the cookie dough and sprinkling it between layers is a totally viable option as well.
Full blog: Cookie Dough Ice Cream Cake
Gluten Free Cookie Dough Ice Cream
Here’s a recipe for gluten-free cookie dough with that same nostalgic cold, creamy vanilla and cookie dough taste but with a gluten-free spin.
Ingredients
Cookie Dough
- 1/2 stick of salted butter (if using unsalted, increase salt to 1/4 teaspoon)
- 3 tablespoons brown sugar
- 1 tablespoon white sugar
- 1 teaspoon vanilla extract
- 2 tablespoons of milk, divided
- 1/2 cup almond flour
- 2 tablespoons gluten-free flour blend
- 1/8 teaspoon salt
- 1/4 cup chopped dark chocolate
Ice Cream
- 1 cup of very cold heavy cream
- 2 teaspoons vanilla extract
- 1 can of sweetened condensed milk (14.5 oz)
- Dash of cinnamon (optional)
How to Make
For the Cookie Dough
- Combine your salted butter with the brown and white sugars and beat until light and fluffy.
- Add the vanilla extract and one tablespoon of milk to the mixture.
- Add almond flour, gluten-free blend, and salt. Mix until just combined.
- If the dough seems crumbly, add an additional tablespoon of milk. Stir to combine.
- Gently fold in chopped dark chocolate.
- Portion the finished dough into small bite-sized balls and place them on parchment paper. Allow the gluten-free cookie dough balls to sit in the freezer as you prepare the ice cream.
For the Ice Cream
- Start by adding your very cold (but not frozen) heavy whipped cream to a large bowl.
- Using a hand mixer or whisk, beat the heavy cream until it begins to thicken.
- Stir in the vanilla extract and continue beating until stiff peaks form.
- Once stiff peaks have formed, stir in the sweetened condensed milk. Keep stirring until the mixture is completely uniform.
- Fold the reserved frozen miniature cookie dough chunks into the vanilla ice cream base along with the cinnamon, if using.
- Transfer the cookie dough ice cream to a freezer-safe container, where it will remain at best quality for up to two weeks.
- Freeze for at least 6 hours before indulging your tastebuds.
- Enjoy!
Tips
- For this recipe, you won’t need an ice cream maker.
- You can adjust the sweetness and flavor according to your preference by adding more or less sweetened condensed milk and vanilla extract.
- Feel free to use any gluten-free flour blend that suits your dietary needs and taste.
Full blog: Gluten Free Cookie Dough Ice Cream
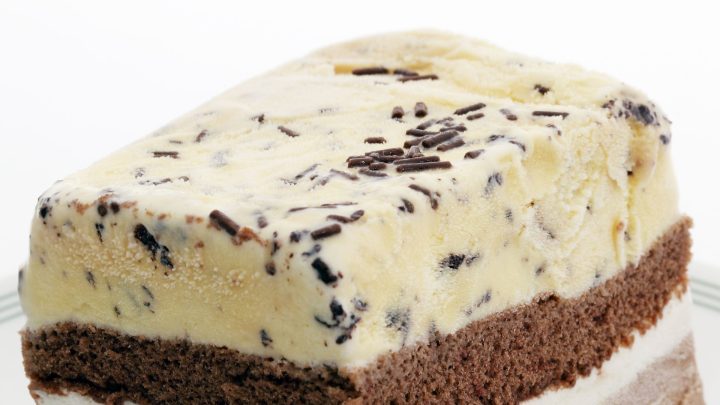
Cookie Dough Pop Tarts
These two snack favorites come combined in one to yield a deliciously decadent treat.
Ingredients
Pop Tart Pastry
- 2 frozen wheat puff pastry sheets
- 8 oz cream cheese, room temperature
- 1/2 teaspoon pure vanilla extract
- 2 tablespoons granulated sugar
- 2 tablespoons brown sugar
Edible Cookie Dough
- 1/2 cup brown sugar, packed
- 3/4 cup granulated sugar
- 1 stick of butter, room temperature
- 1/4 cup heavy cream (can substitute milk if needed)
- 1 teaspoon vanilla extract
- 1/2 teaspoon sea salt
- 1 1/2 cups all-purpose wheat flour (heat-treated if eating dough uncooked)
- 1 cup miniature chocolate chips
- 8 ounces of cream cheese, softened
Vanilla Glaze
- 2 cups powdered sugar, sifted
- 1 tablespoon pure vanilla extract
- 1/4 cup heavy cream
- Rainbow sprinkles (optional, for extra pop tart-ness)
How to Make
- Preheat your oven to 350 degrees Fahrenheit.
- Spread all of your flour evenly over a lined baking sheet. Bake the flour for 7-10 minutes.
- Allow to cool completely.
- Begin by making your cookie dough. Start by beating your sugar and butter together using a hand mixer.
- Once fluffy and pale, add in your heavy cream, vanilla extract, and sea salt. Mix until well combined.
- Add all-purpose flour. Mix until just incorporated.
- Gently fold in your miniature chocolate chips.
- Remove 1/3 of your cookie dough and set it in the refrigerator until firm. Add the cream cheese to the rest of the cookie dough at room temperature. Blend with a mixer until well combined. Set aside.
- Preheat your oven to 375 degrees Fahrenheit.
- Begin assembling your pop tart pastries by lightly flouring your surface. Roll the pastry onto the floured surface and cut it into a total of 12 rectangles (6 per each pastry sheet).
- Grab a baking sheet and line it with parchment paper. On top of the parchment, add six of your pre-cut pastry rectangles.
- Scoop your cookie dough filling evenly onto each of the six rectangles. One to two scoops of cookie dough should be enough. Leave room at the edges of your pastries as you smooth out your cookie dough. Anywhere between 1/2 inch to 3/4 inch of clearance should be fine.
- Top each rectangle with another rectangle to make a closed pastry pocket. Crimp the edges with a fork to ensure that each pastry is sealed tightly around the cookie dough-flavored filling.
- Bake your pastries for about 24-25 minutes or until they begin to turn golden brown.
- Allow the pastries to cool completely.
- To make the vanilla frosting, combine your powdered sugar with the vanilla and heavy cream.
- Once finished, frost your pop tarts with the glaze. Sprinkle rainbow sprinkles on top.
- If you wish, you can use the chilled cookie dough in the fridge to top your pastries. To do so, simply roll your cookie dough into small balls and place them on top of the frosting.
Full blog: Cookie Dough Pop Tarts

Dunkin Cookie Dough Iced Coffee
Unfortunately, this drink isn’t always available year-round, but you can easily recreate it at home with just a few ingredients.
Ingredients
Dupe 1: With Ice Cream
- 2 cups brewed coffee (cold)
- 1 cup ice-cold milk
- 1/2 cup cookie dough ice cream
- 1 tablespoon vanilla extract
- 1 tablespoon brown sugar
- 2 tablespoons crushed chocolate chip cookies (optional)
Dupe 2: With Syrup
- 2 cups brewed coffee (cold)
- 2 pumps mocha syrup
- 2 pumps French vanilla syrup
- 2 pumps caramel syrup
- 2 creamers
- Whipped cream (optional, for topping)
- Crushed chocolate chip cookies (optional, for topping)
How to Make
Dupe 1: With Ice Cream
- Place your coffee and milk in a blender.
- Add your cookie dough ice cream, vanilla extract, and brown sugar to the mix.
- Blend until smooth.
- Pour your blended frozen coffee into cups.
- Top with crushed chocolate chip cookies (optional).
- Serve over ice.
Dupe 2: With Syrup
- Fill a pitcher with your brewed coffee.
- Add your syrups along with the creamer and mix well.
- Pour into glasses filled with ice.
- Top the beverage with whipped cream and crushed chocolate chip cookies.
- Serve and enjoy!
Tips
- You don’t need to worry about consuming raw cookie dough since the ingredients are safe and edible.
- For an extra chocolatey flavor, you can add a few tablespoons of cocoa powder to the vanilla frosting.
- Keep any leftovers in the refrigerator for a refreshing treat later.
Full blog: Dunkin Cookie Dough Iced Coffee
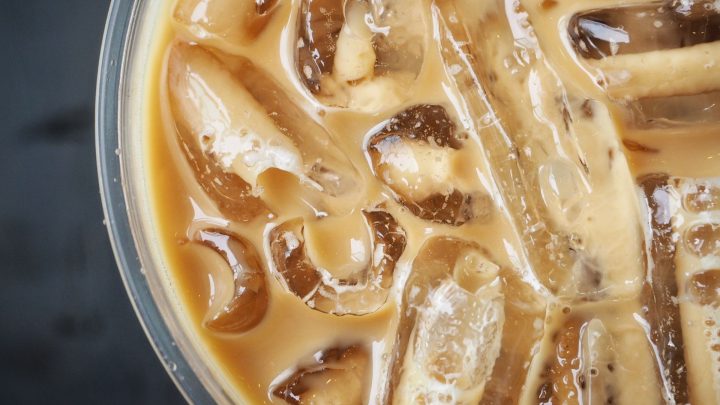
Cookie Dough Variations are A-Plenty!
As we’ve explored these 30 unexpected cookie dough recipes, it’s clear that the possibilities are as endless as they are delicious. These recipes show the joy of cookie dough in all its forms.
There’s a cookie dough recipe here to inspire your culinary adventures!
Let me know if you have your own recipe to share!


